Your support helps us to tell the story
From reproductive rights to climate change to Big Tech, The Independent is on the ground when the story is developing. Whether it's investigating the financials of Elon Musk's pro-Trump PAC or producing our latest documentary, 'The A Word', which shines a light on the American women fighting for reproductive rights, we know how important it is to parse out the facts from the messaging.
At such a critical moment in US history, we need reporters on the ground. Your donation allows us to keep sending journalists to speak to both sides of the story.
The Independent is trusted by Americans across the entire political spectrum. And unlike many other quality news outlets, we choose not to lock Americans out of our reporting and analysis with paywalls. We believe quality journalism should be available to everyone, paid for by those who can afford it.
Your support makes all the difference.Flat fish
All flat fish are classified as white fish, because the greatest concentration of their fat is contained in the liver, which ensures they have lean, white flesh. Although similar in appearance, each species has a distinctive flavour. They include plaice, lemon and Dover sole, brill, turbot, flounder and dabs. Skates and rays, with their cartilaginous (soft) frames, are also flat fish, although prepared differently as it is their wings that are prized in cooking.
This method removes four fillets from a flat fish. Fishmongers will often remove a whole side, so two double fillets from each flat fish. What is important is that you develop a method of filleting that you are comfortable with, that you use your knife safely and that you waste as little fish as possible. It is essential to use a very sharp knife, preferably with a long, flexible blade. First rinse the fish under cold water and dry with kitchen paper. Fish have a natural slime and rinsing it off makes it easier to handle.
Note: Now scrape the board to get rid of any loose bits of fish and rinse well under cold water, then wash well under hot water and detergent. Dry well.
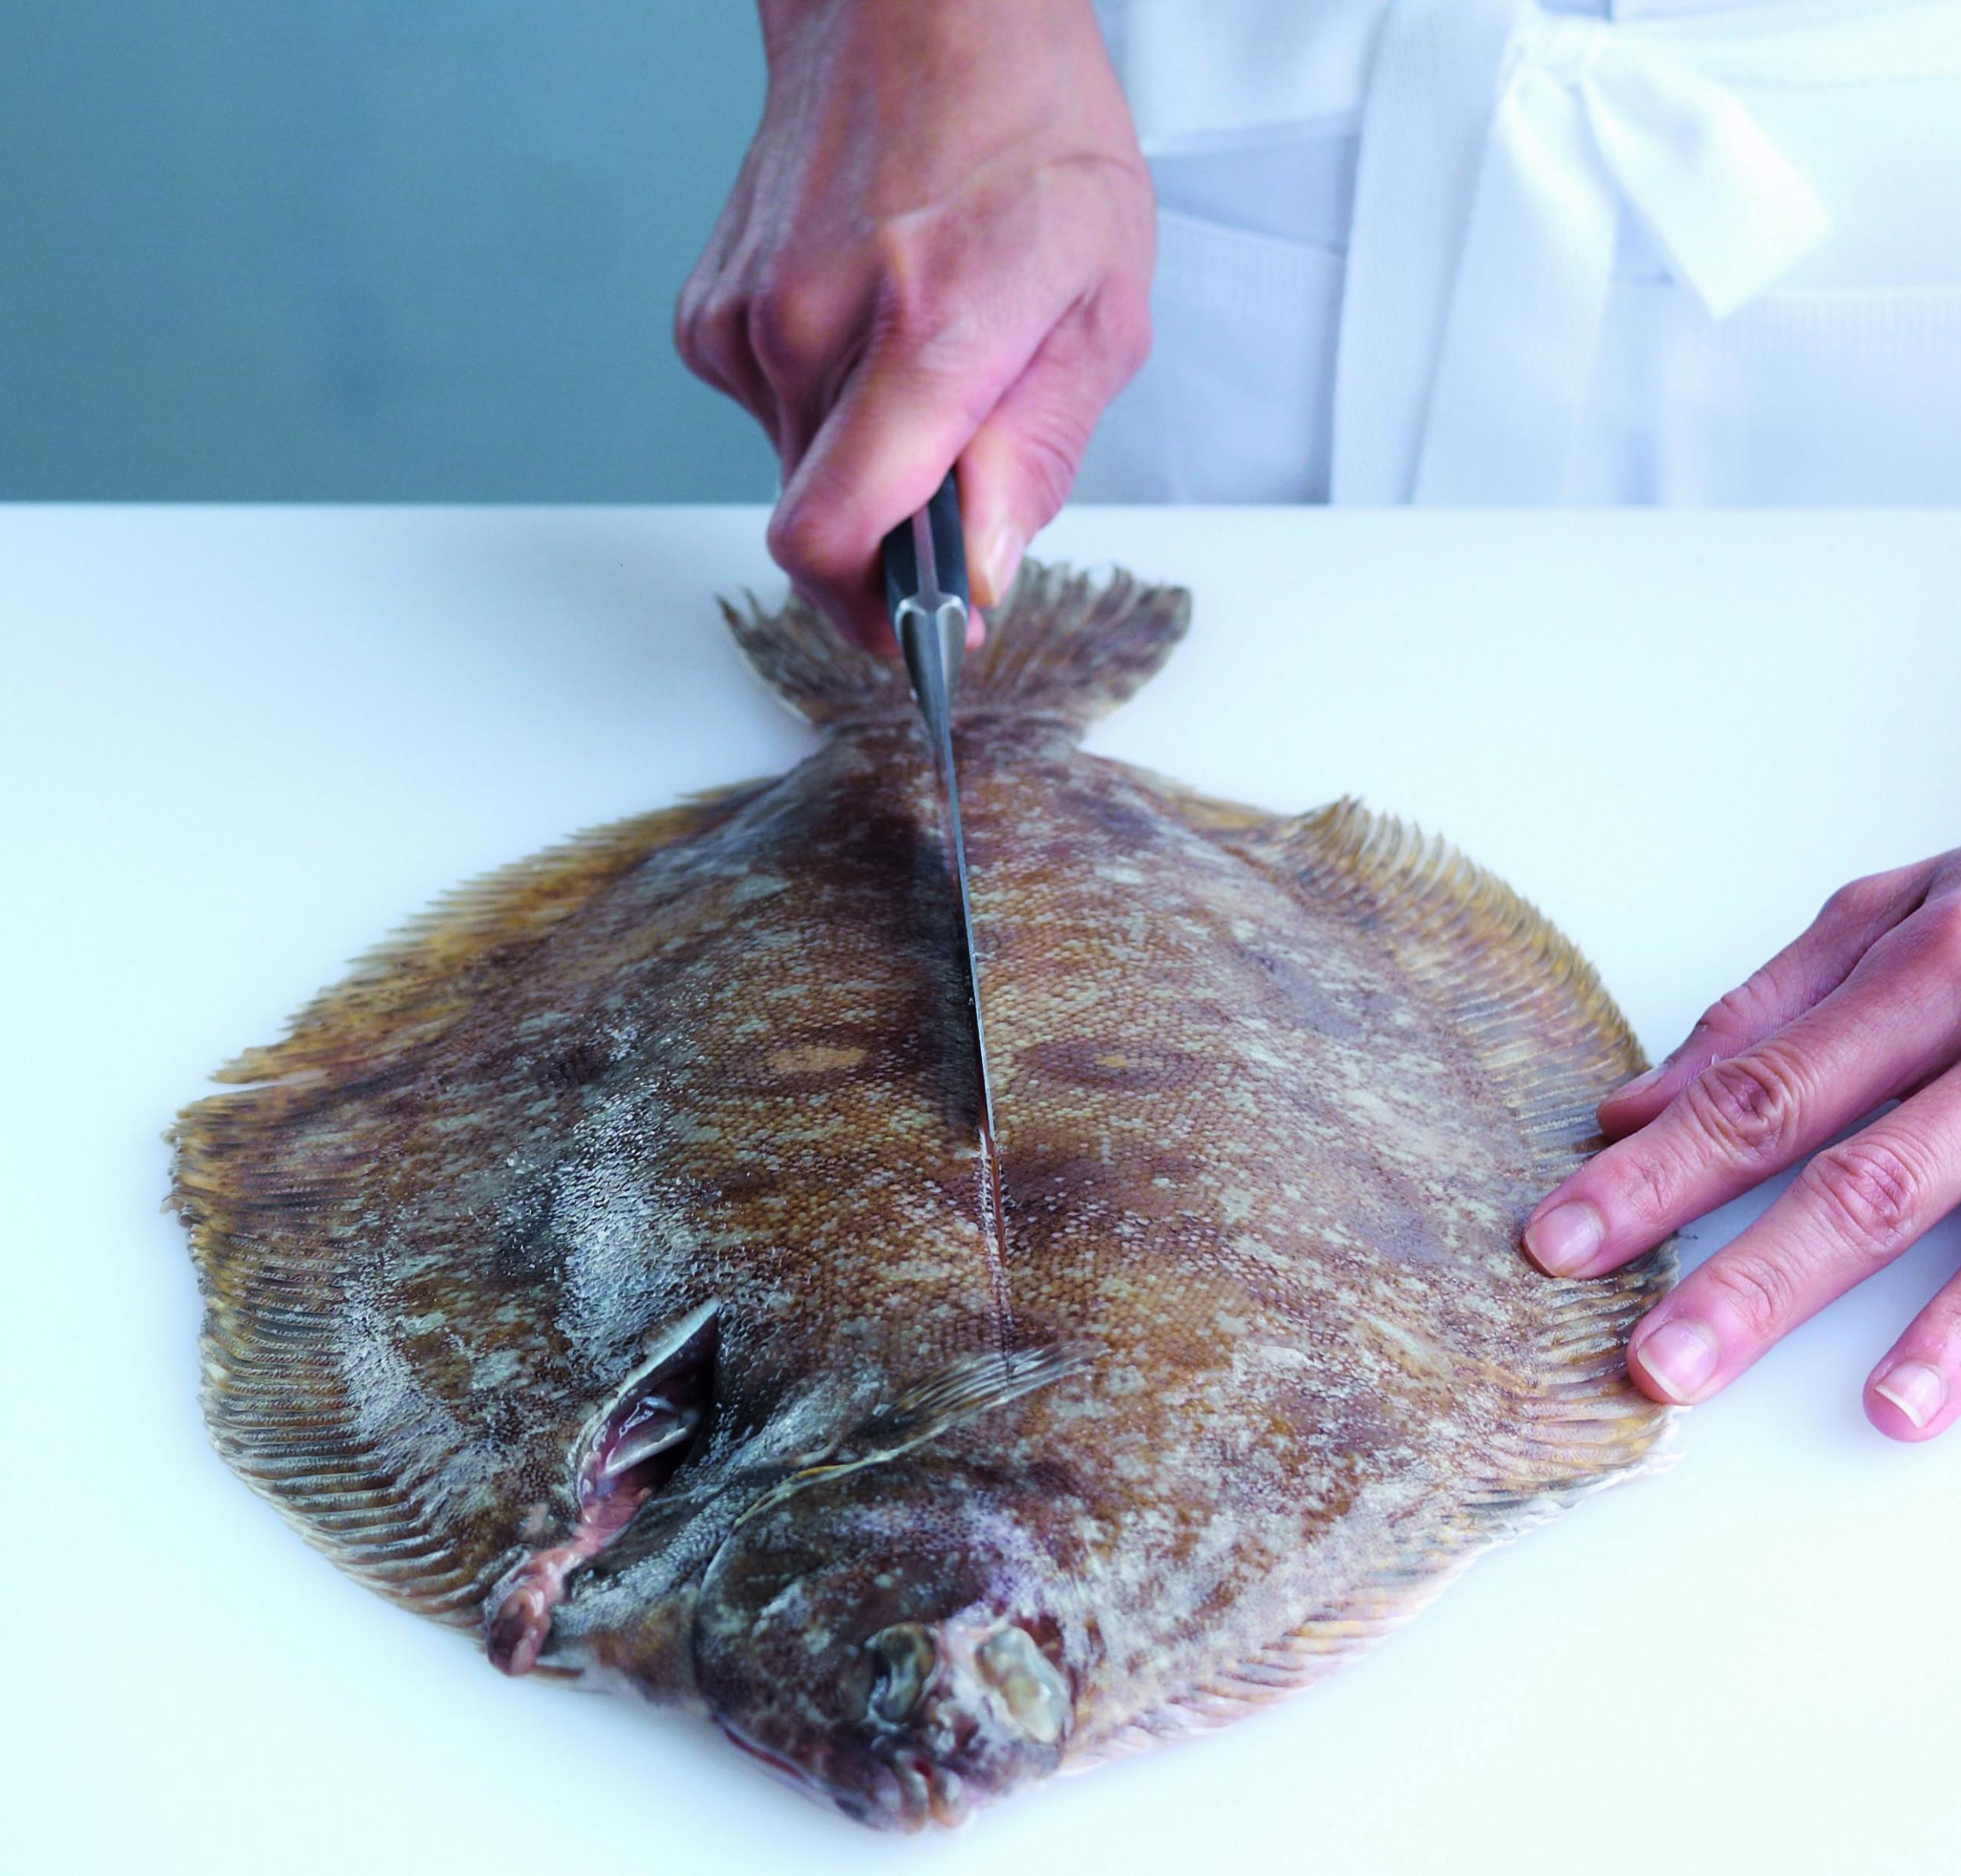
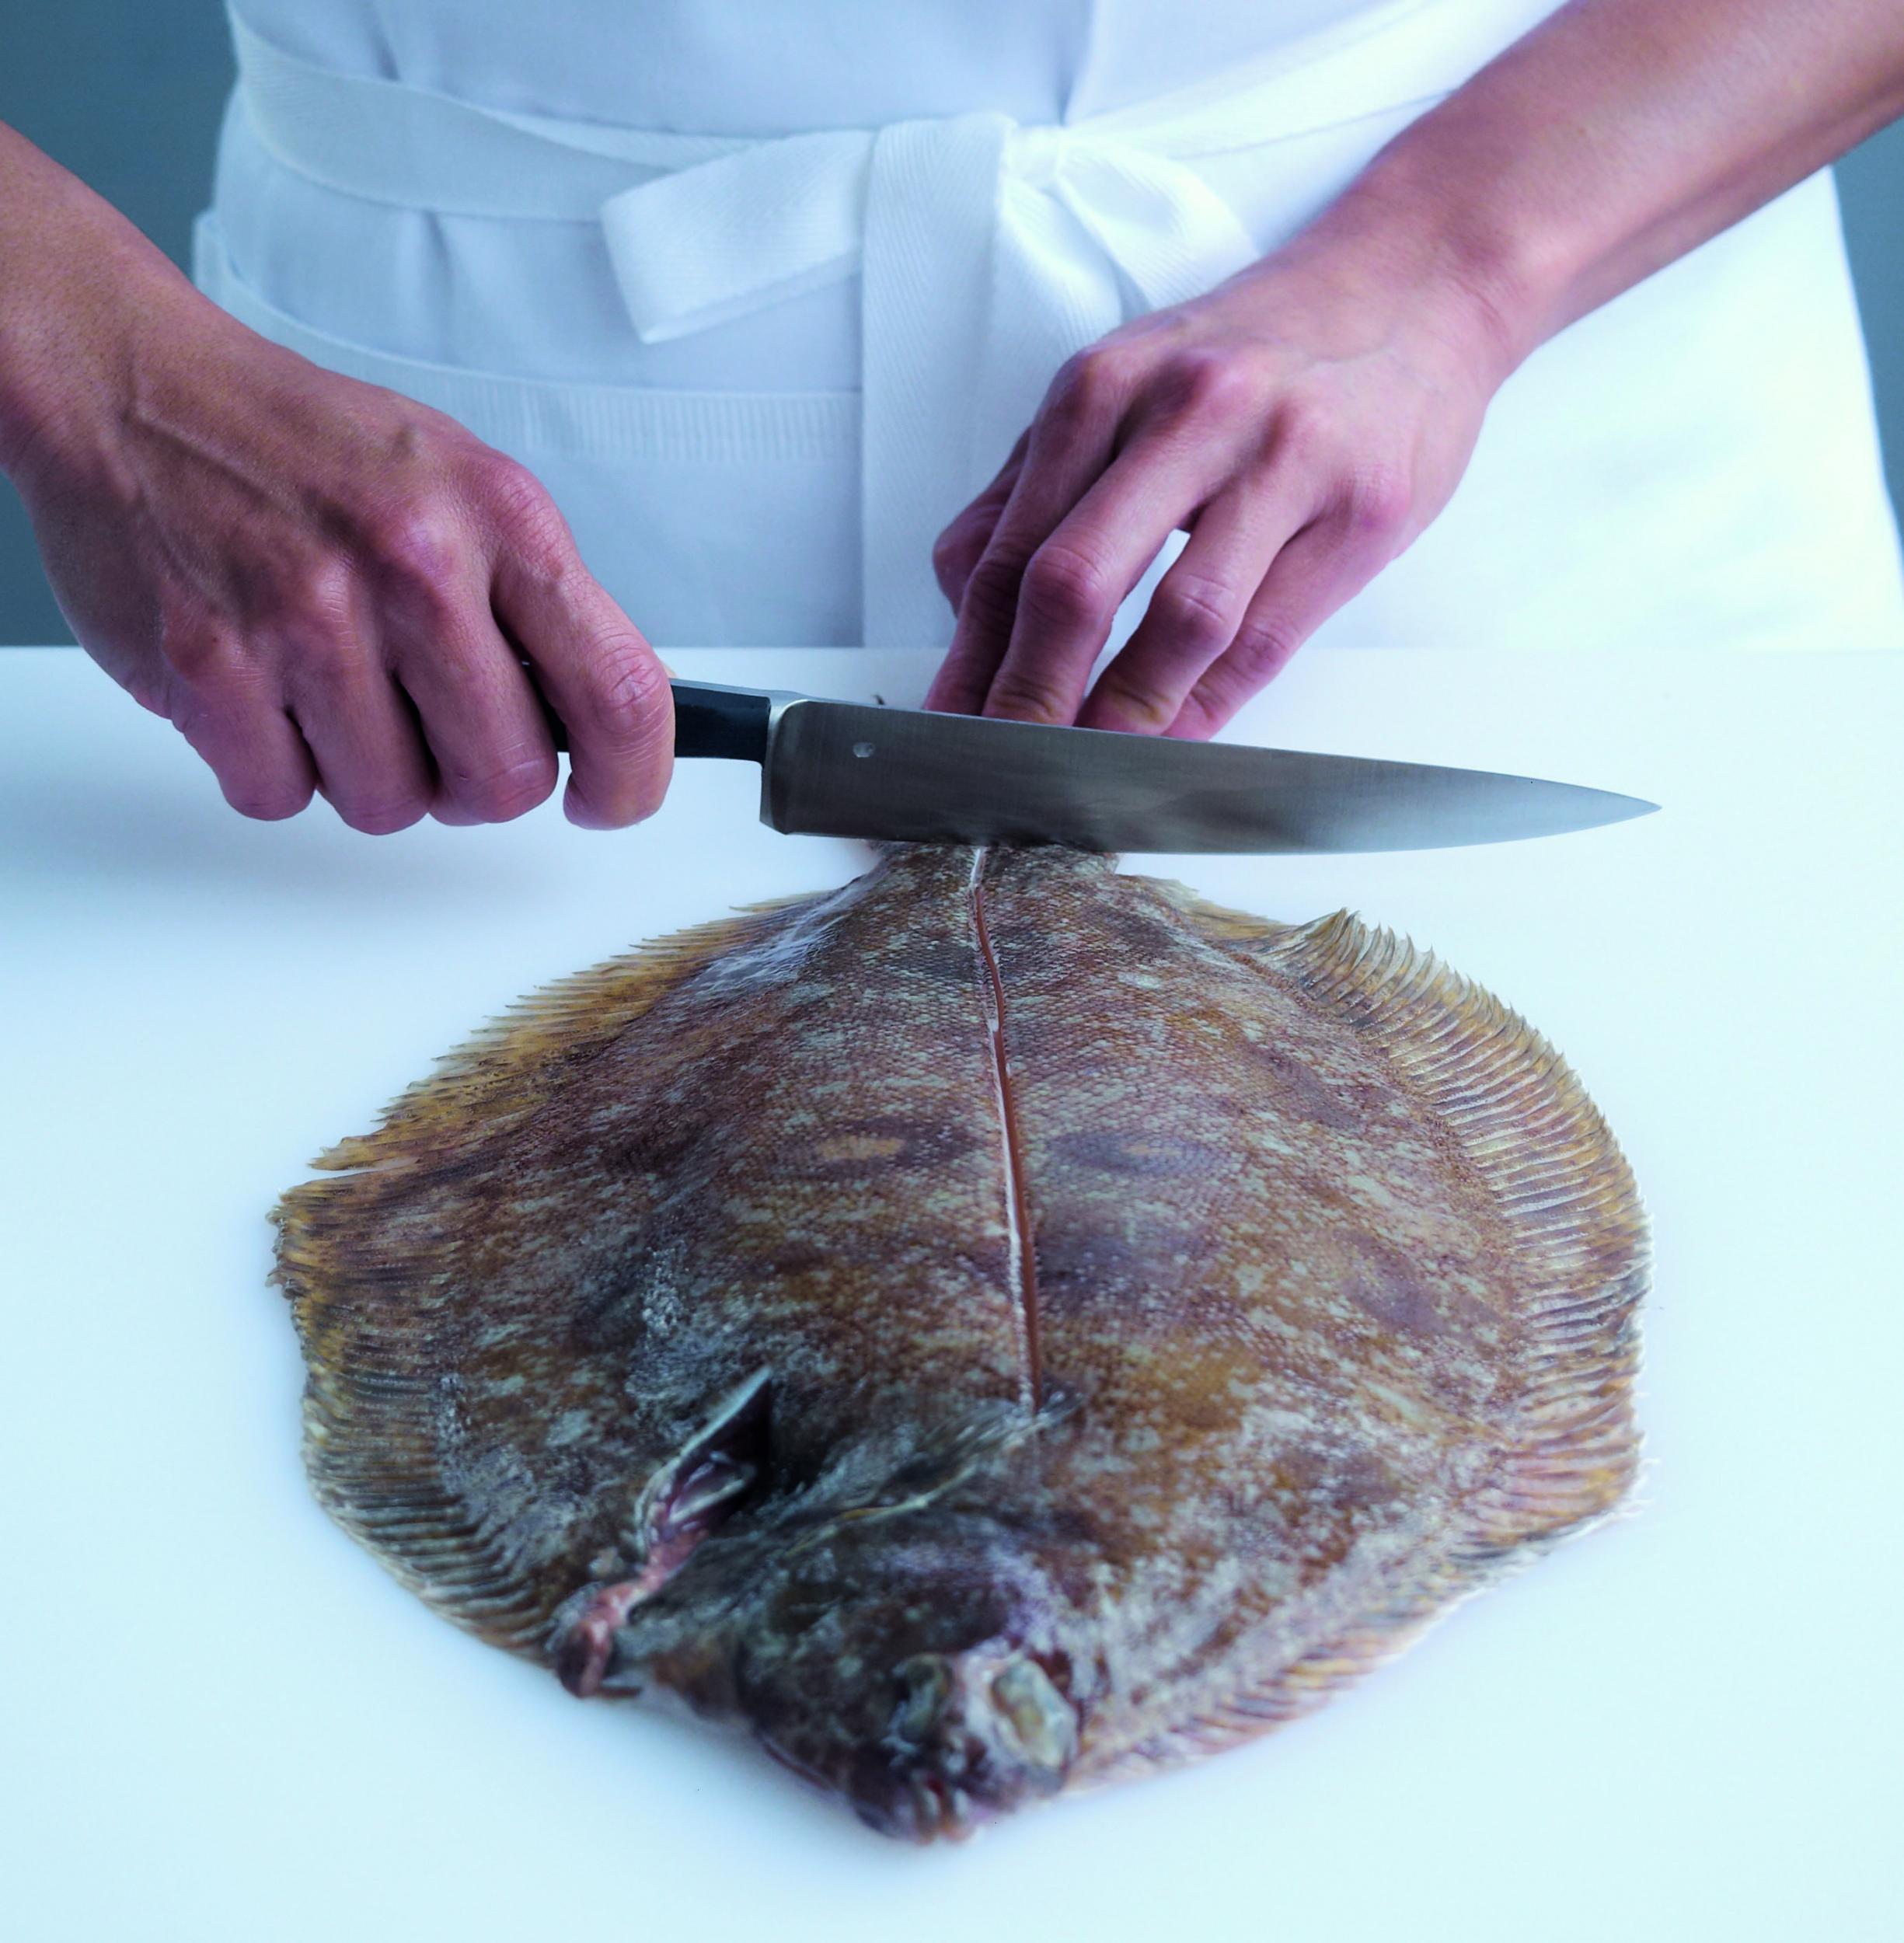
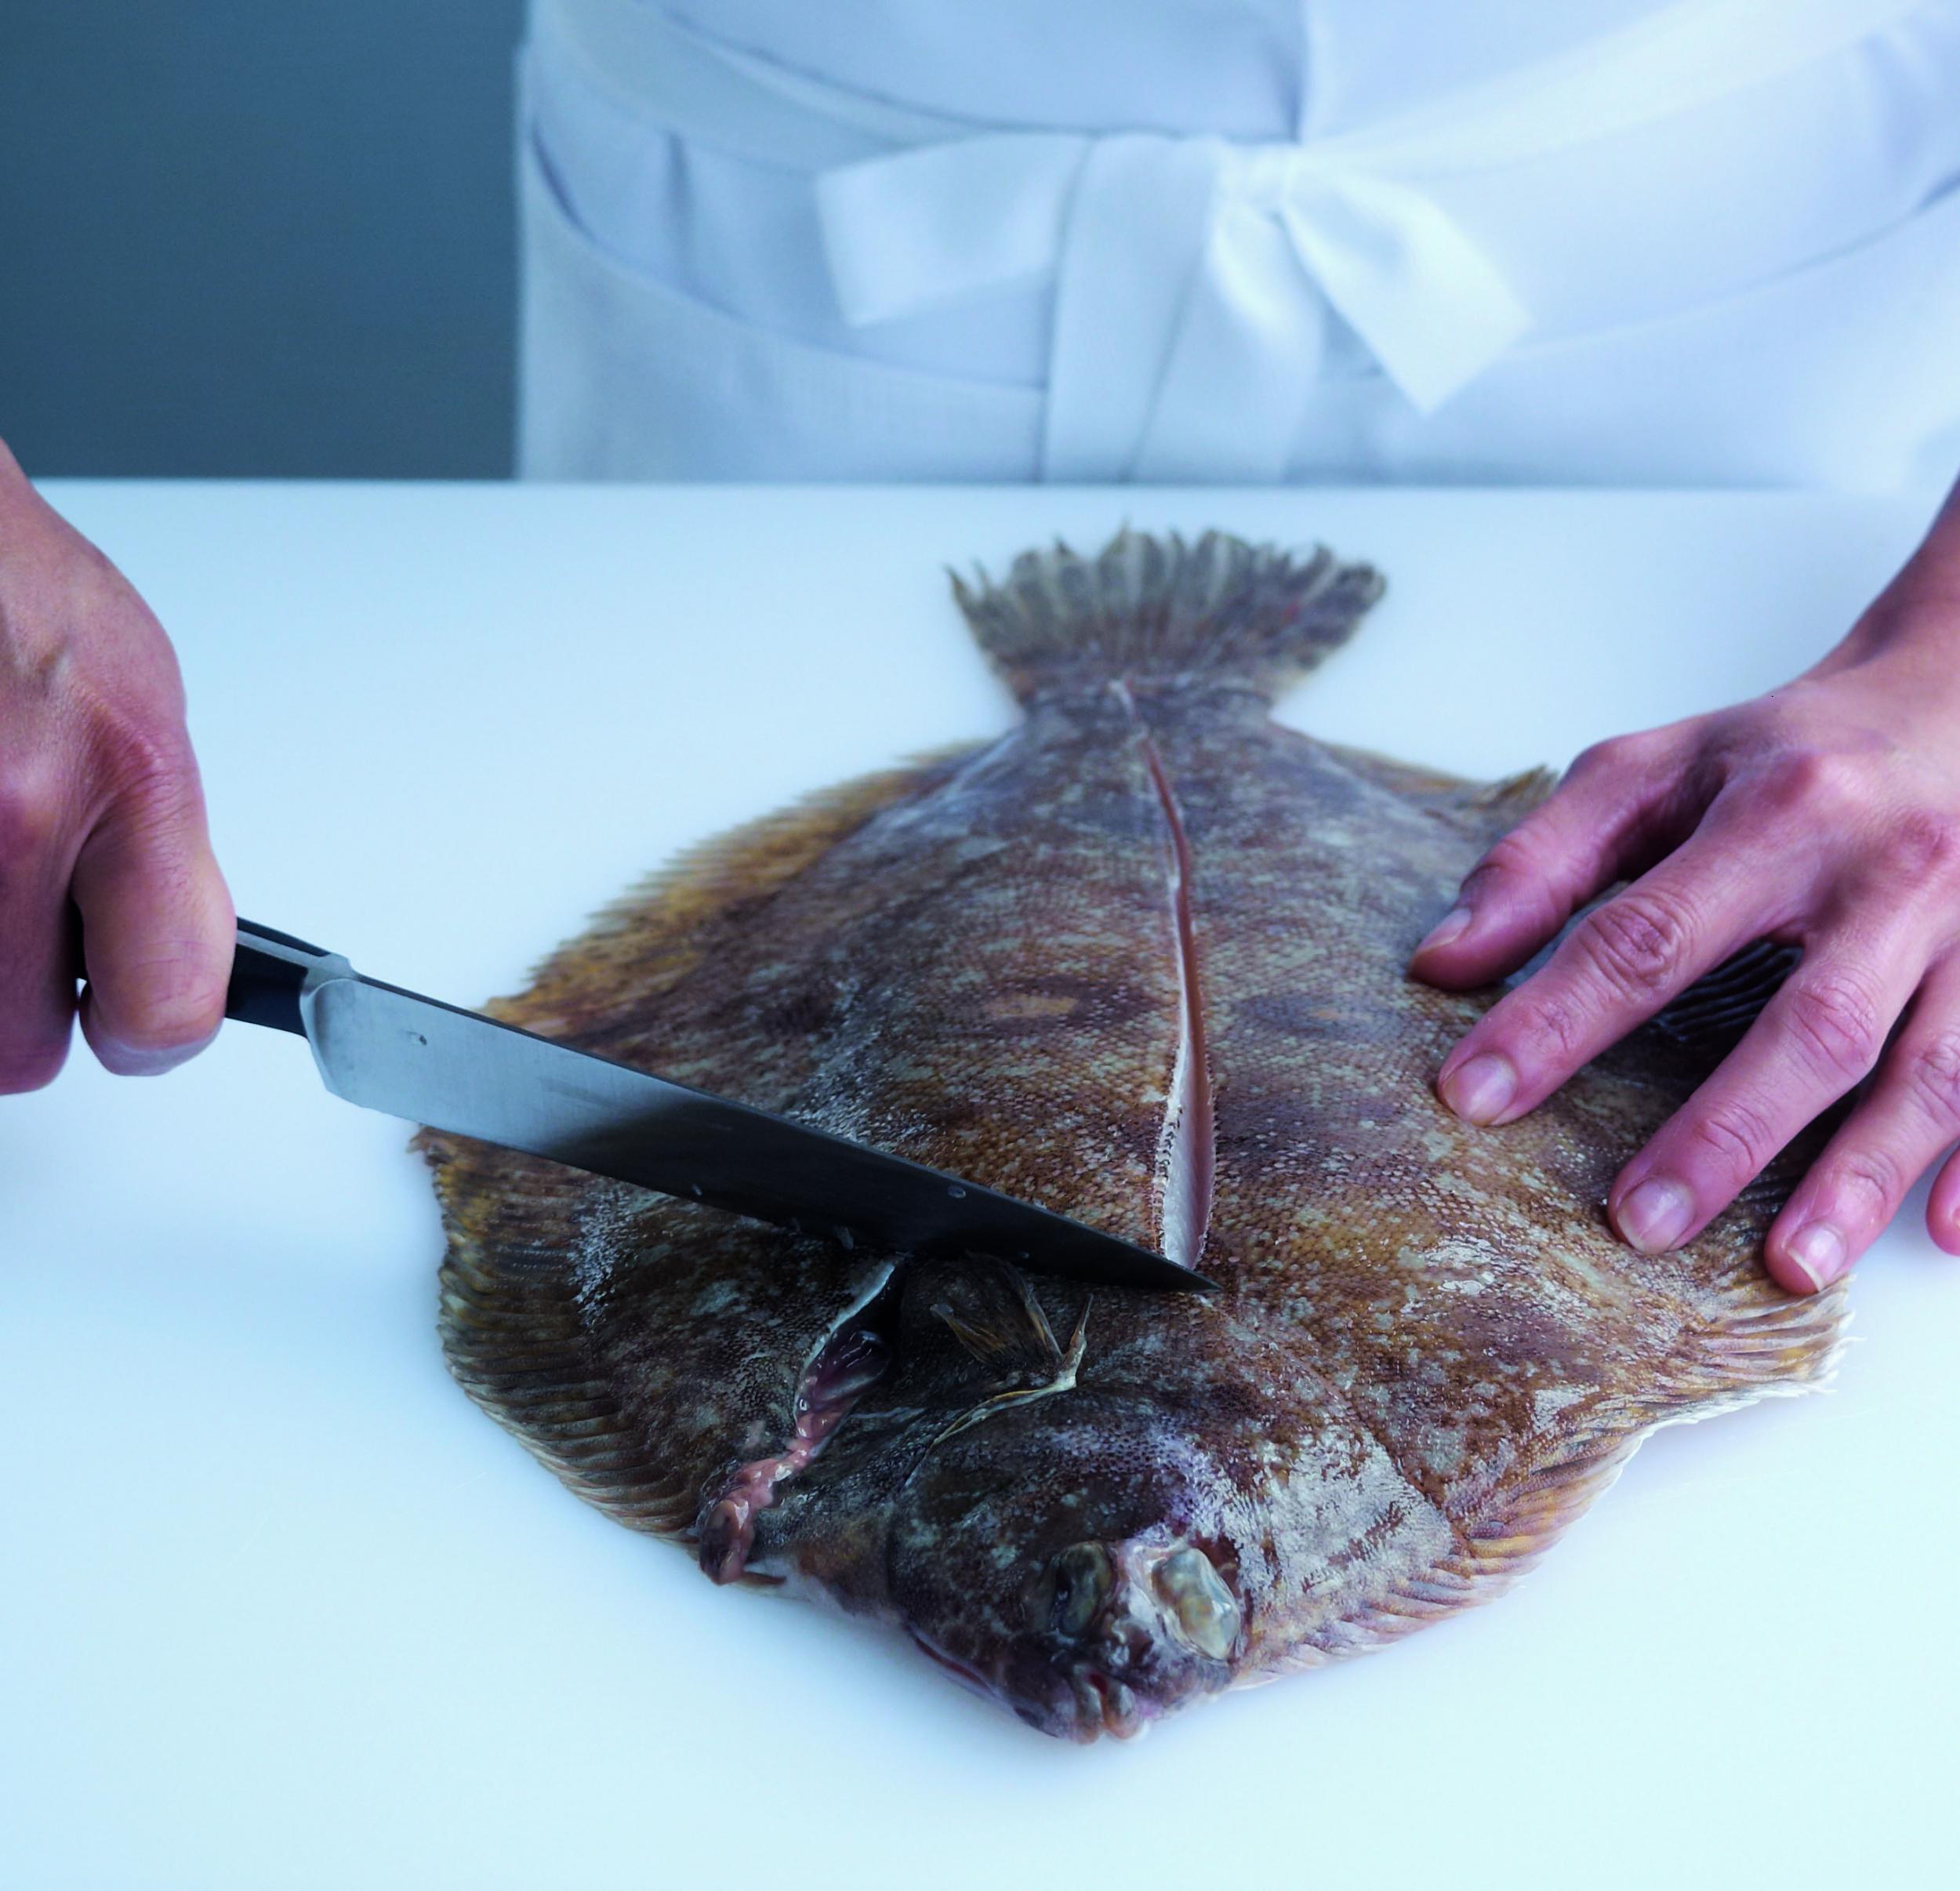
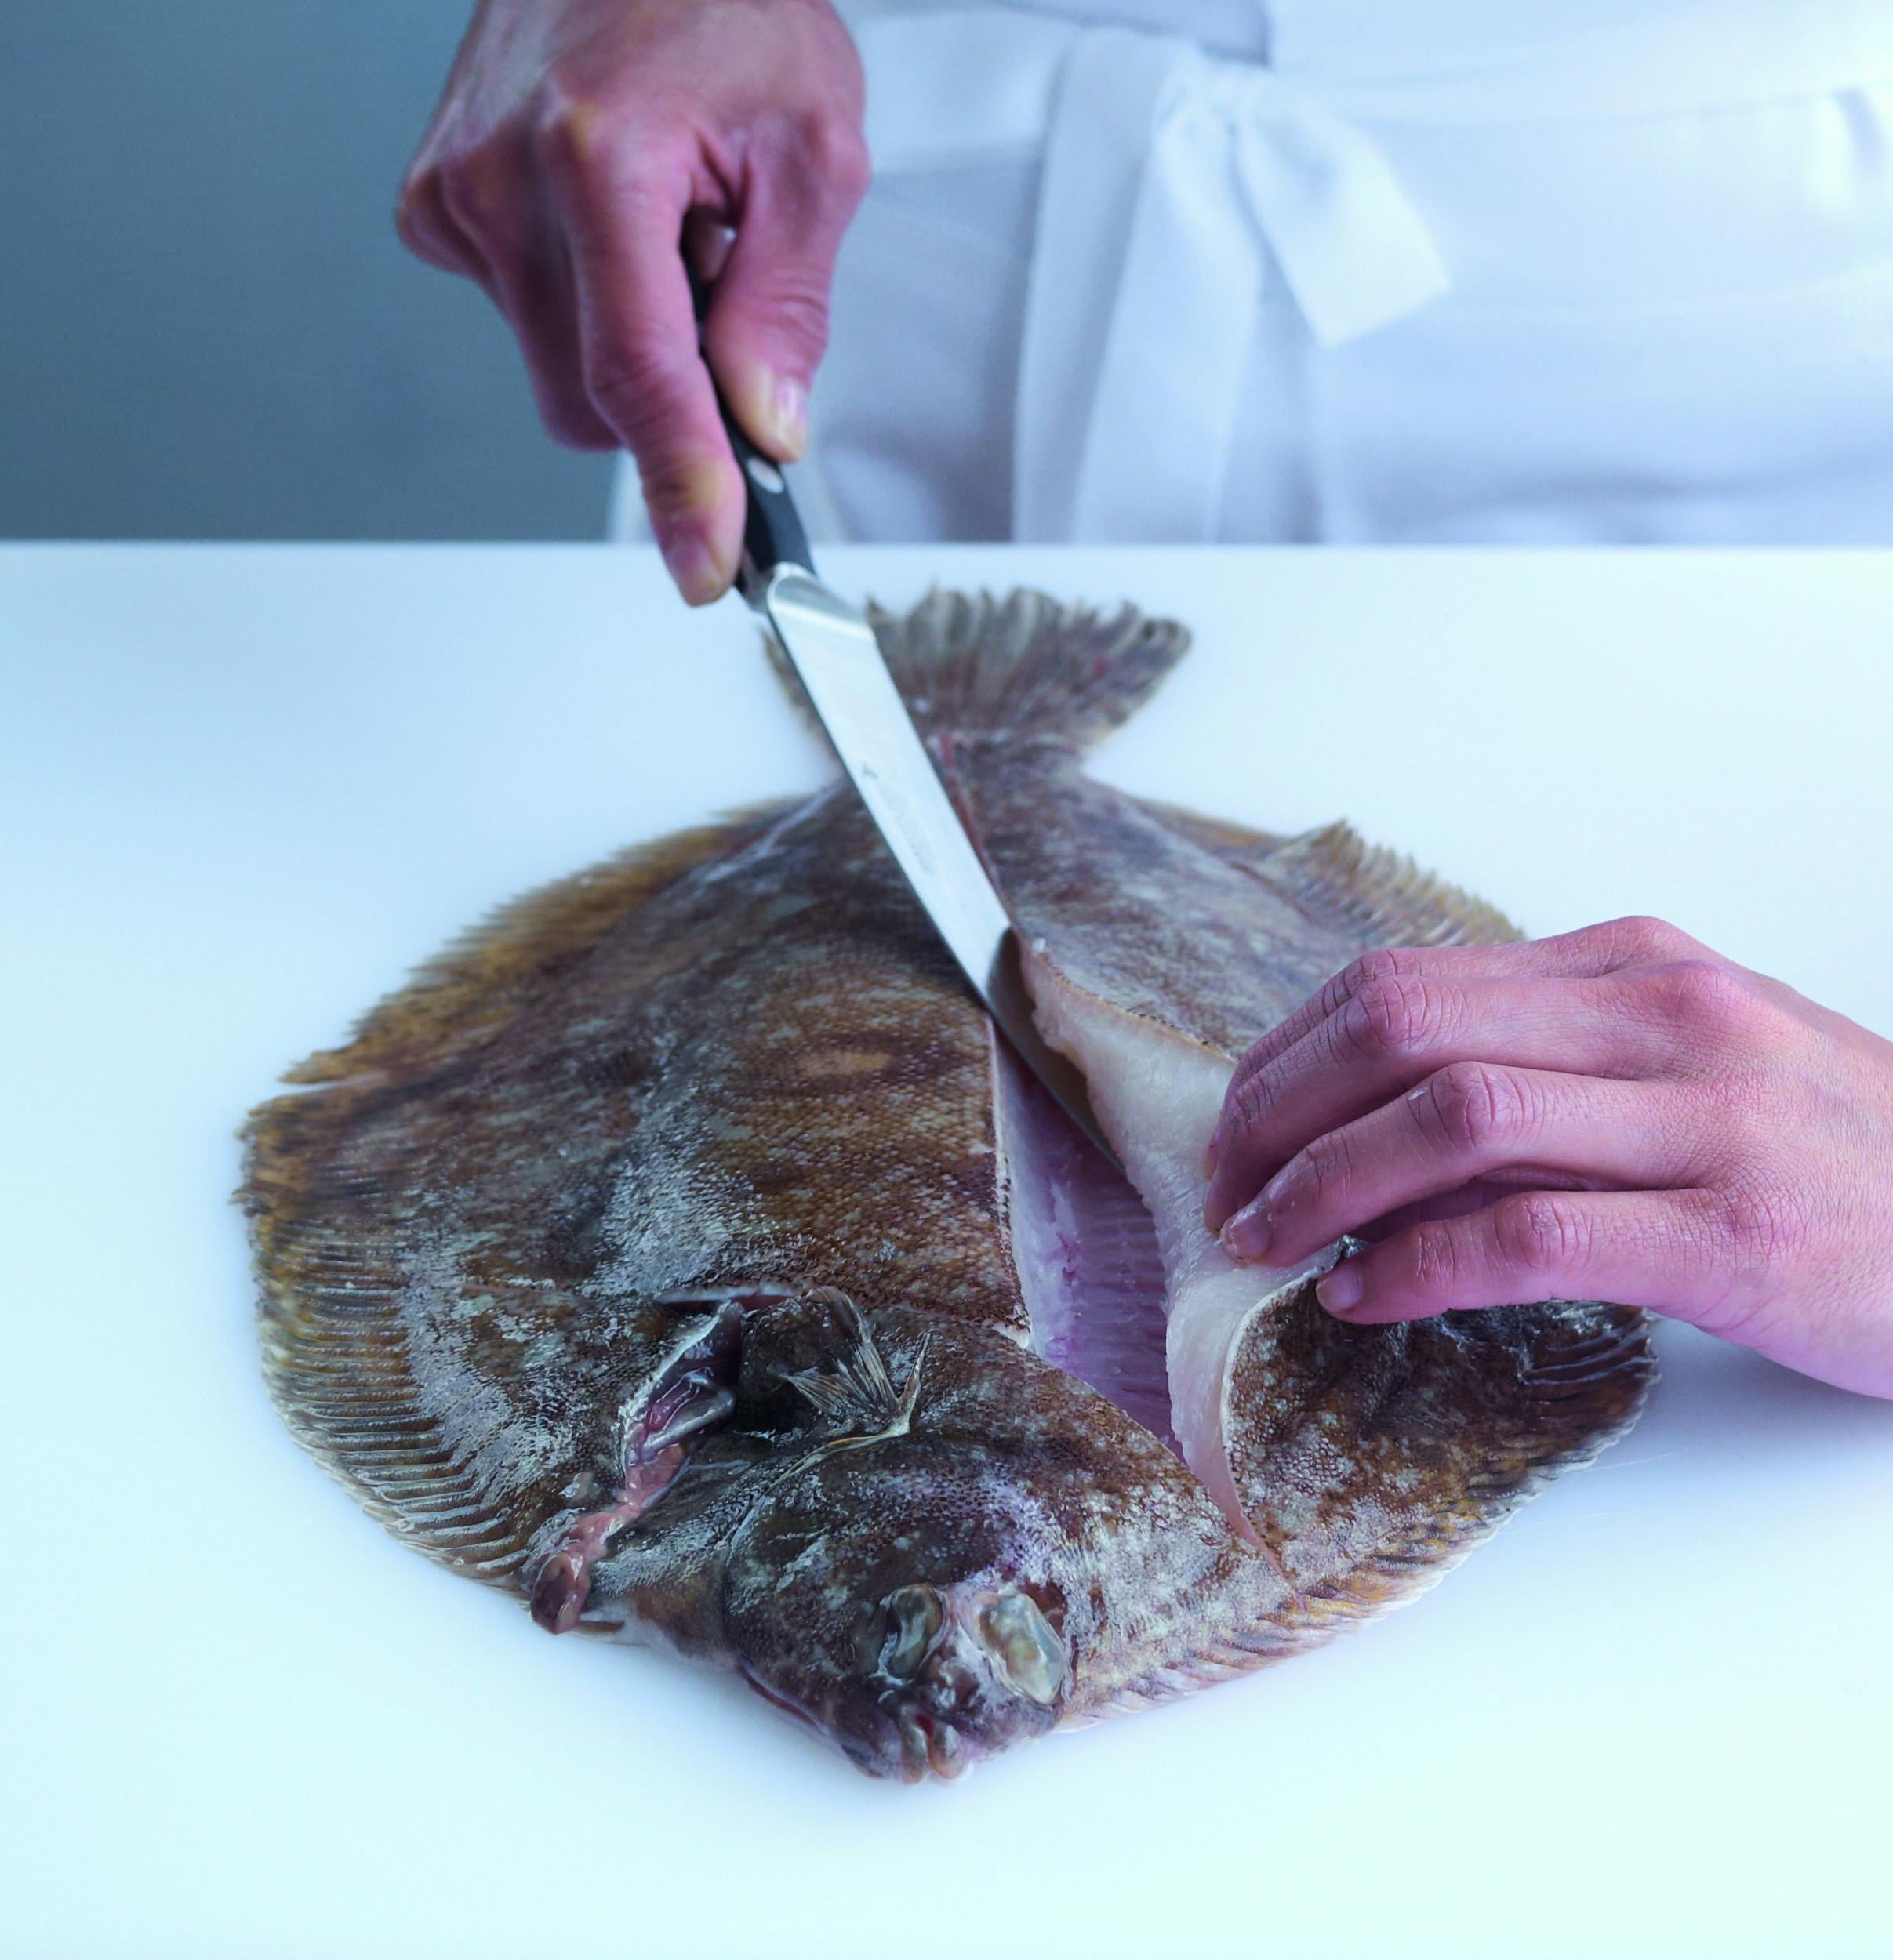
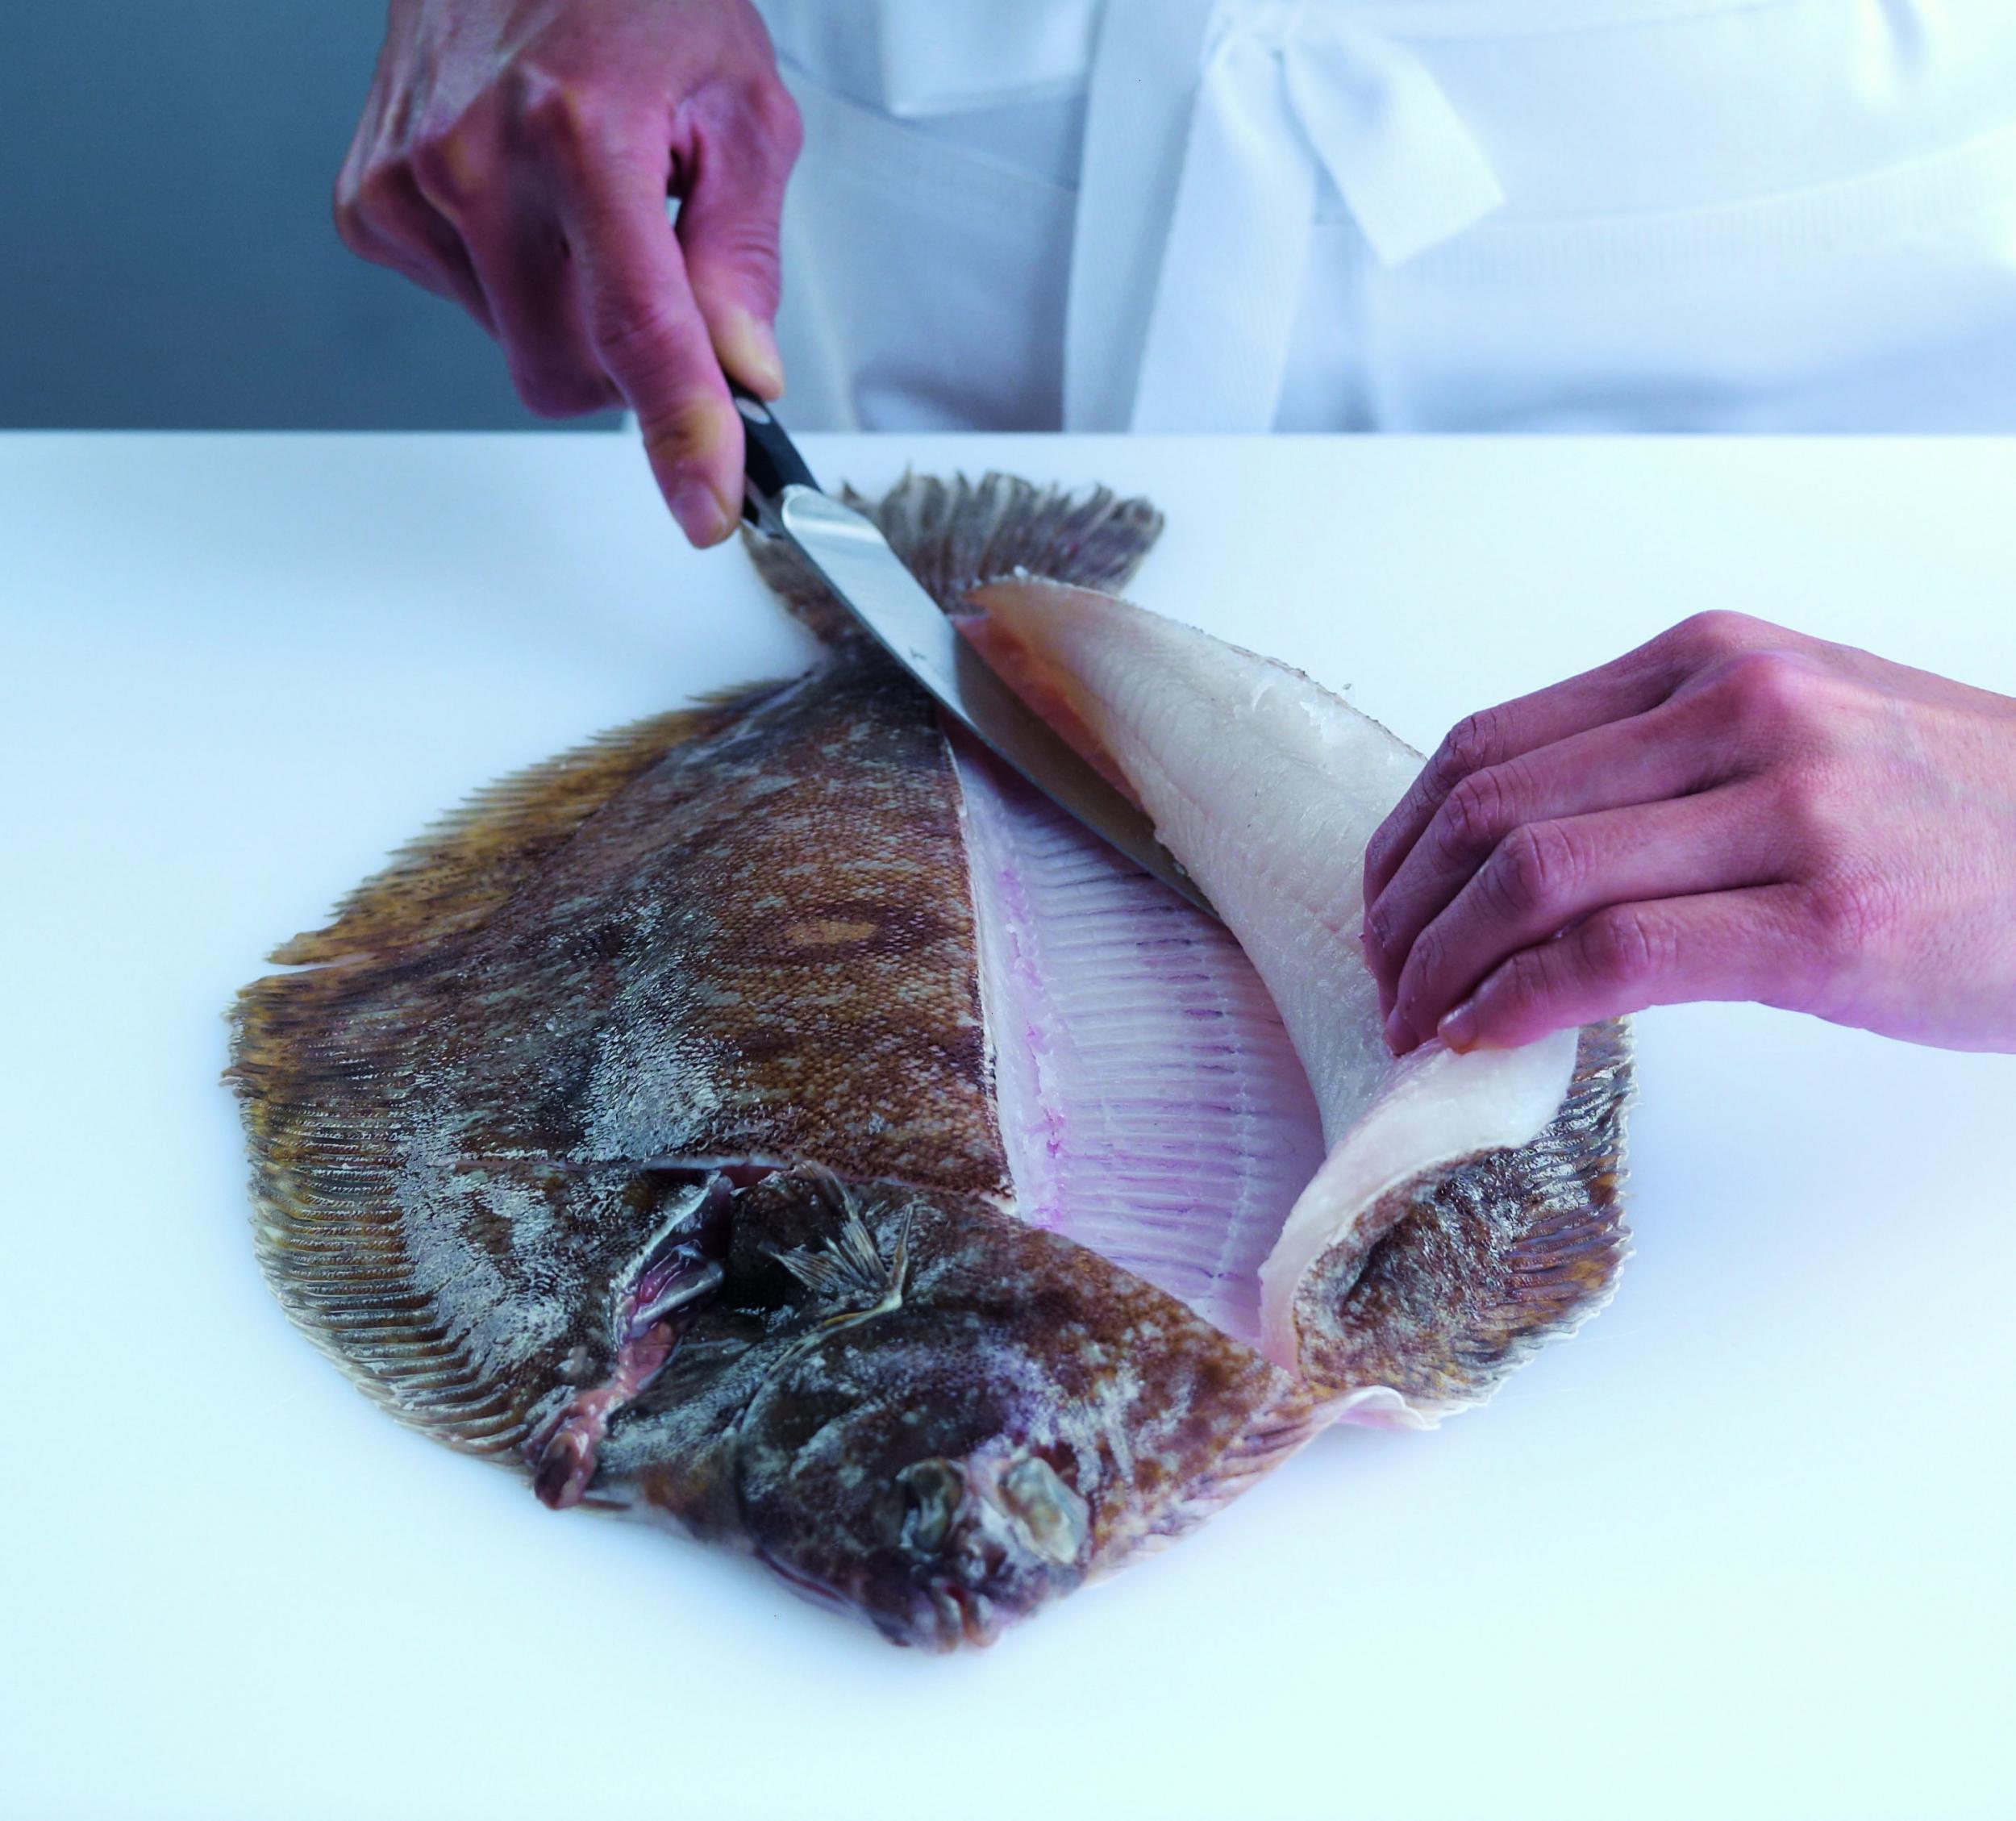
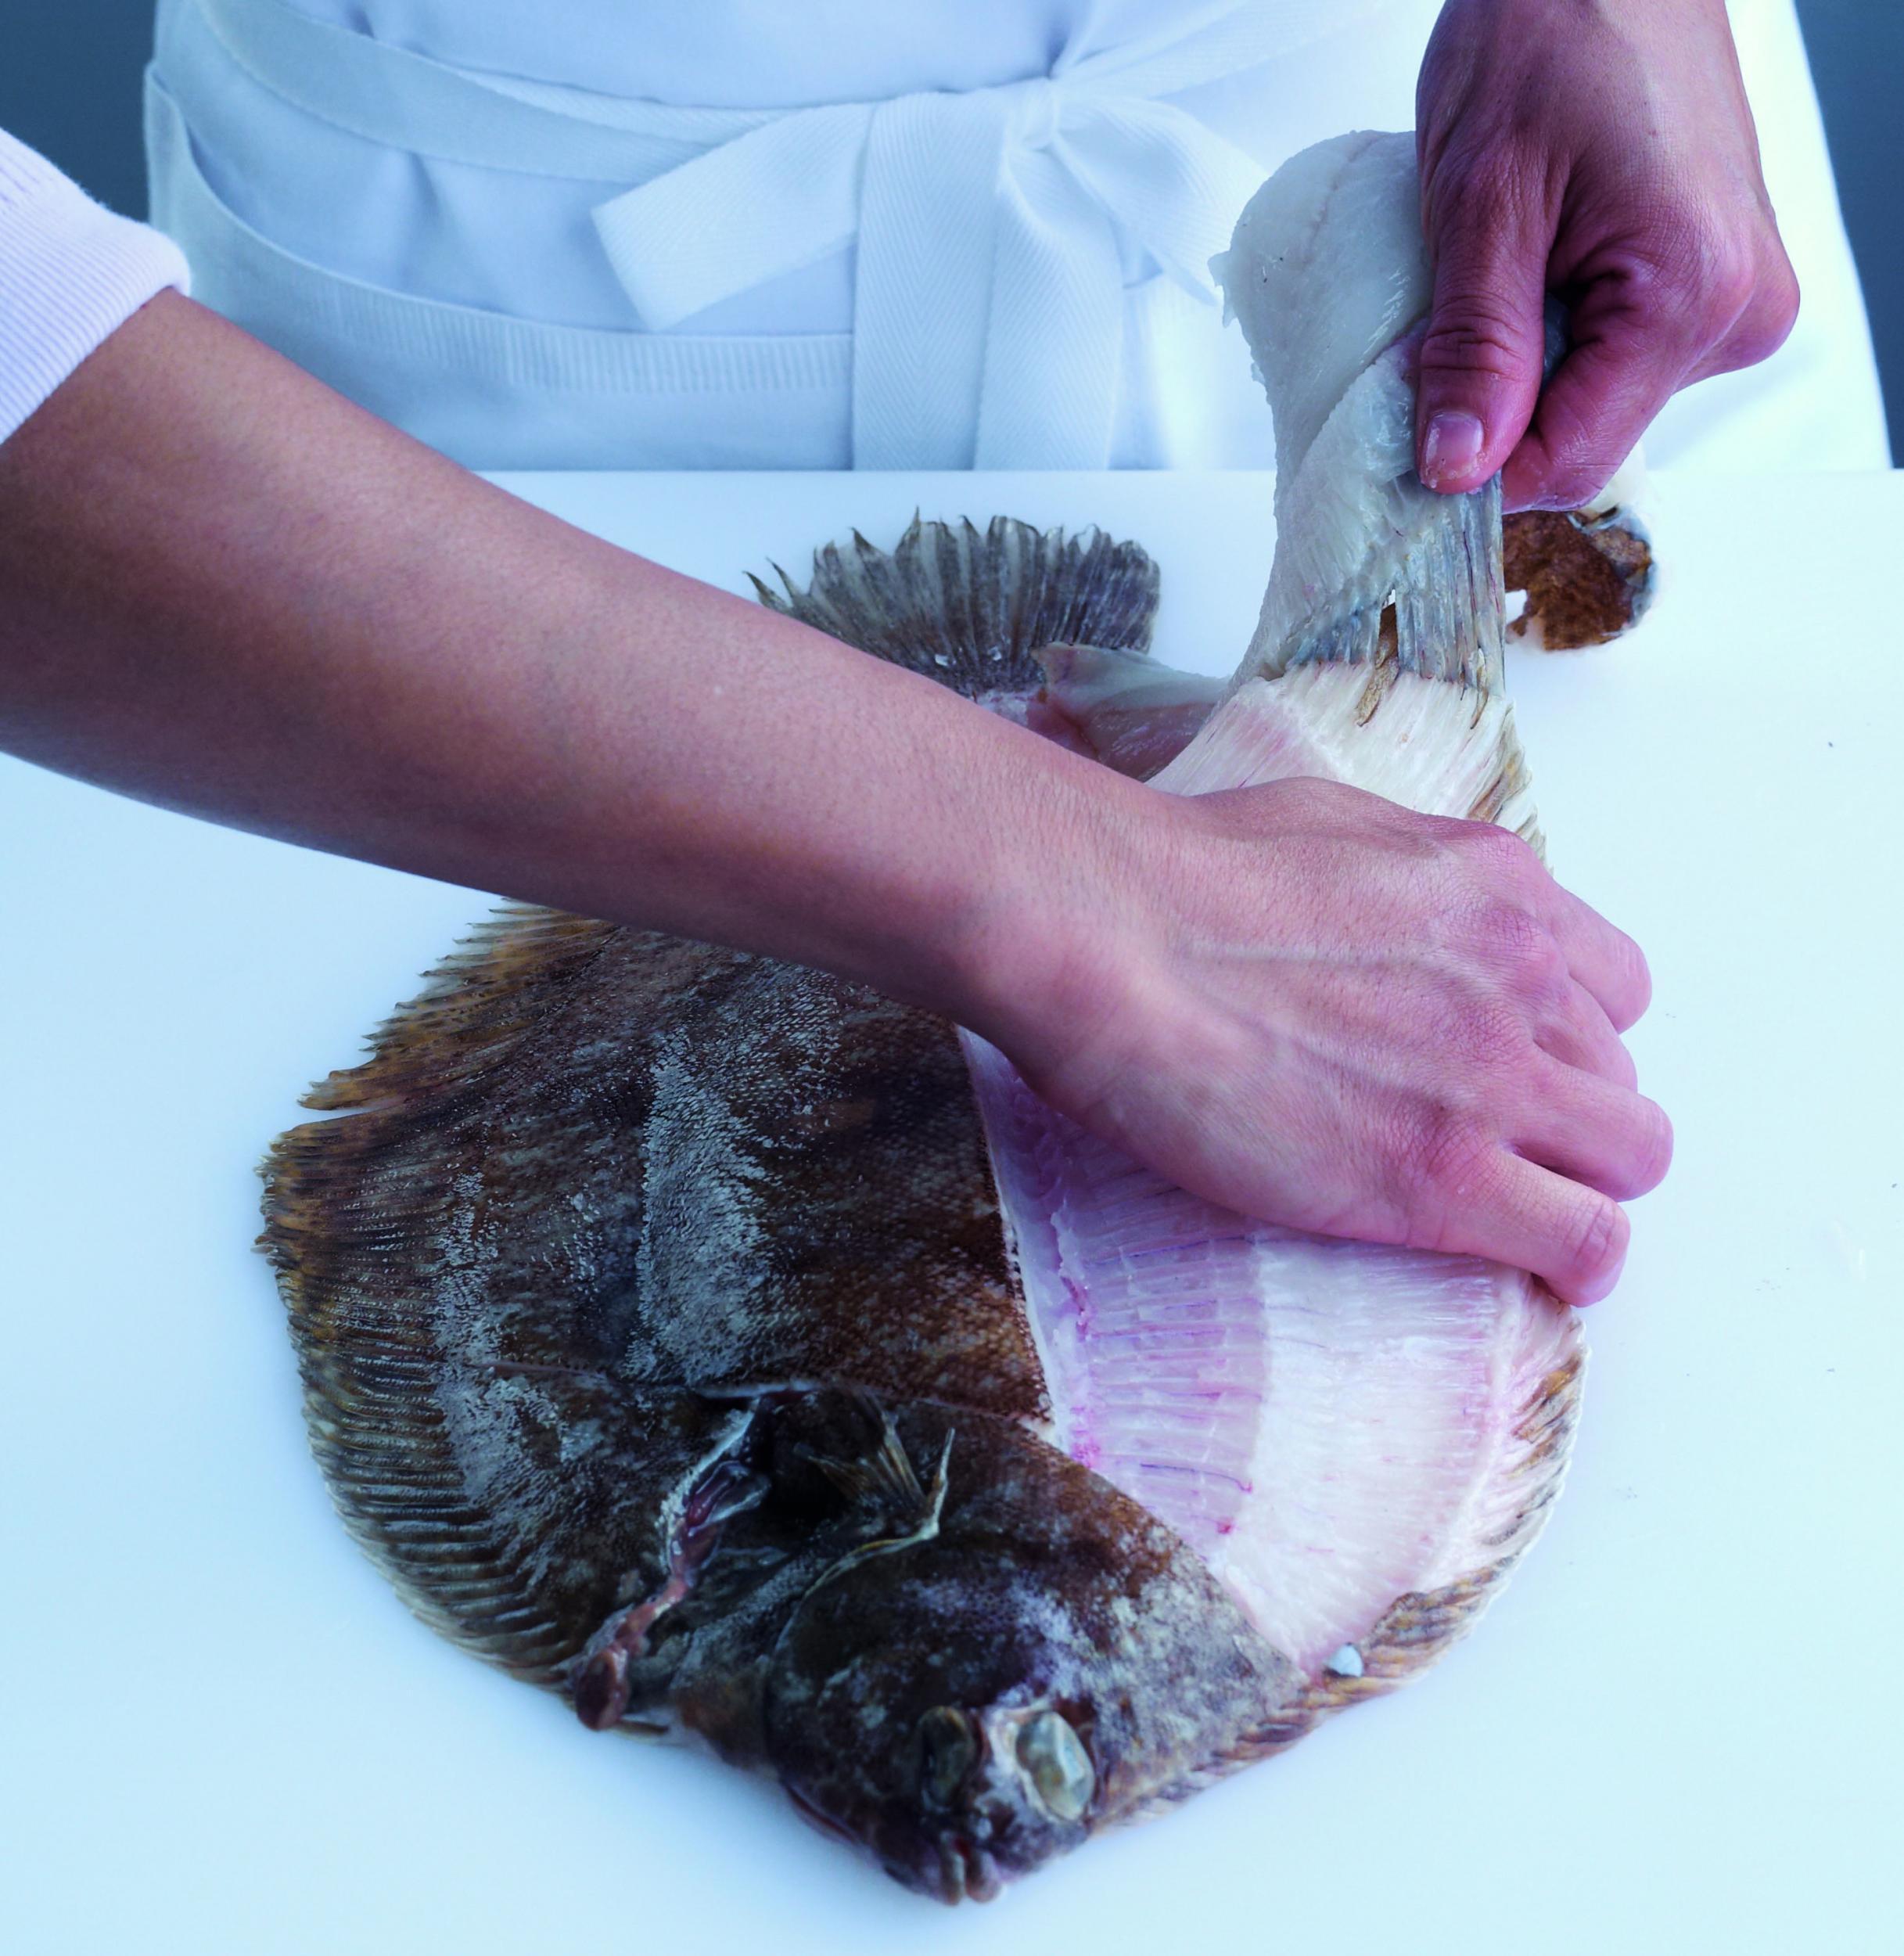
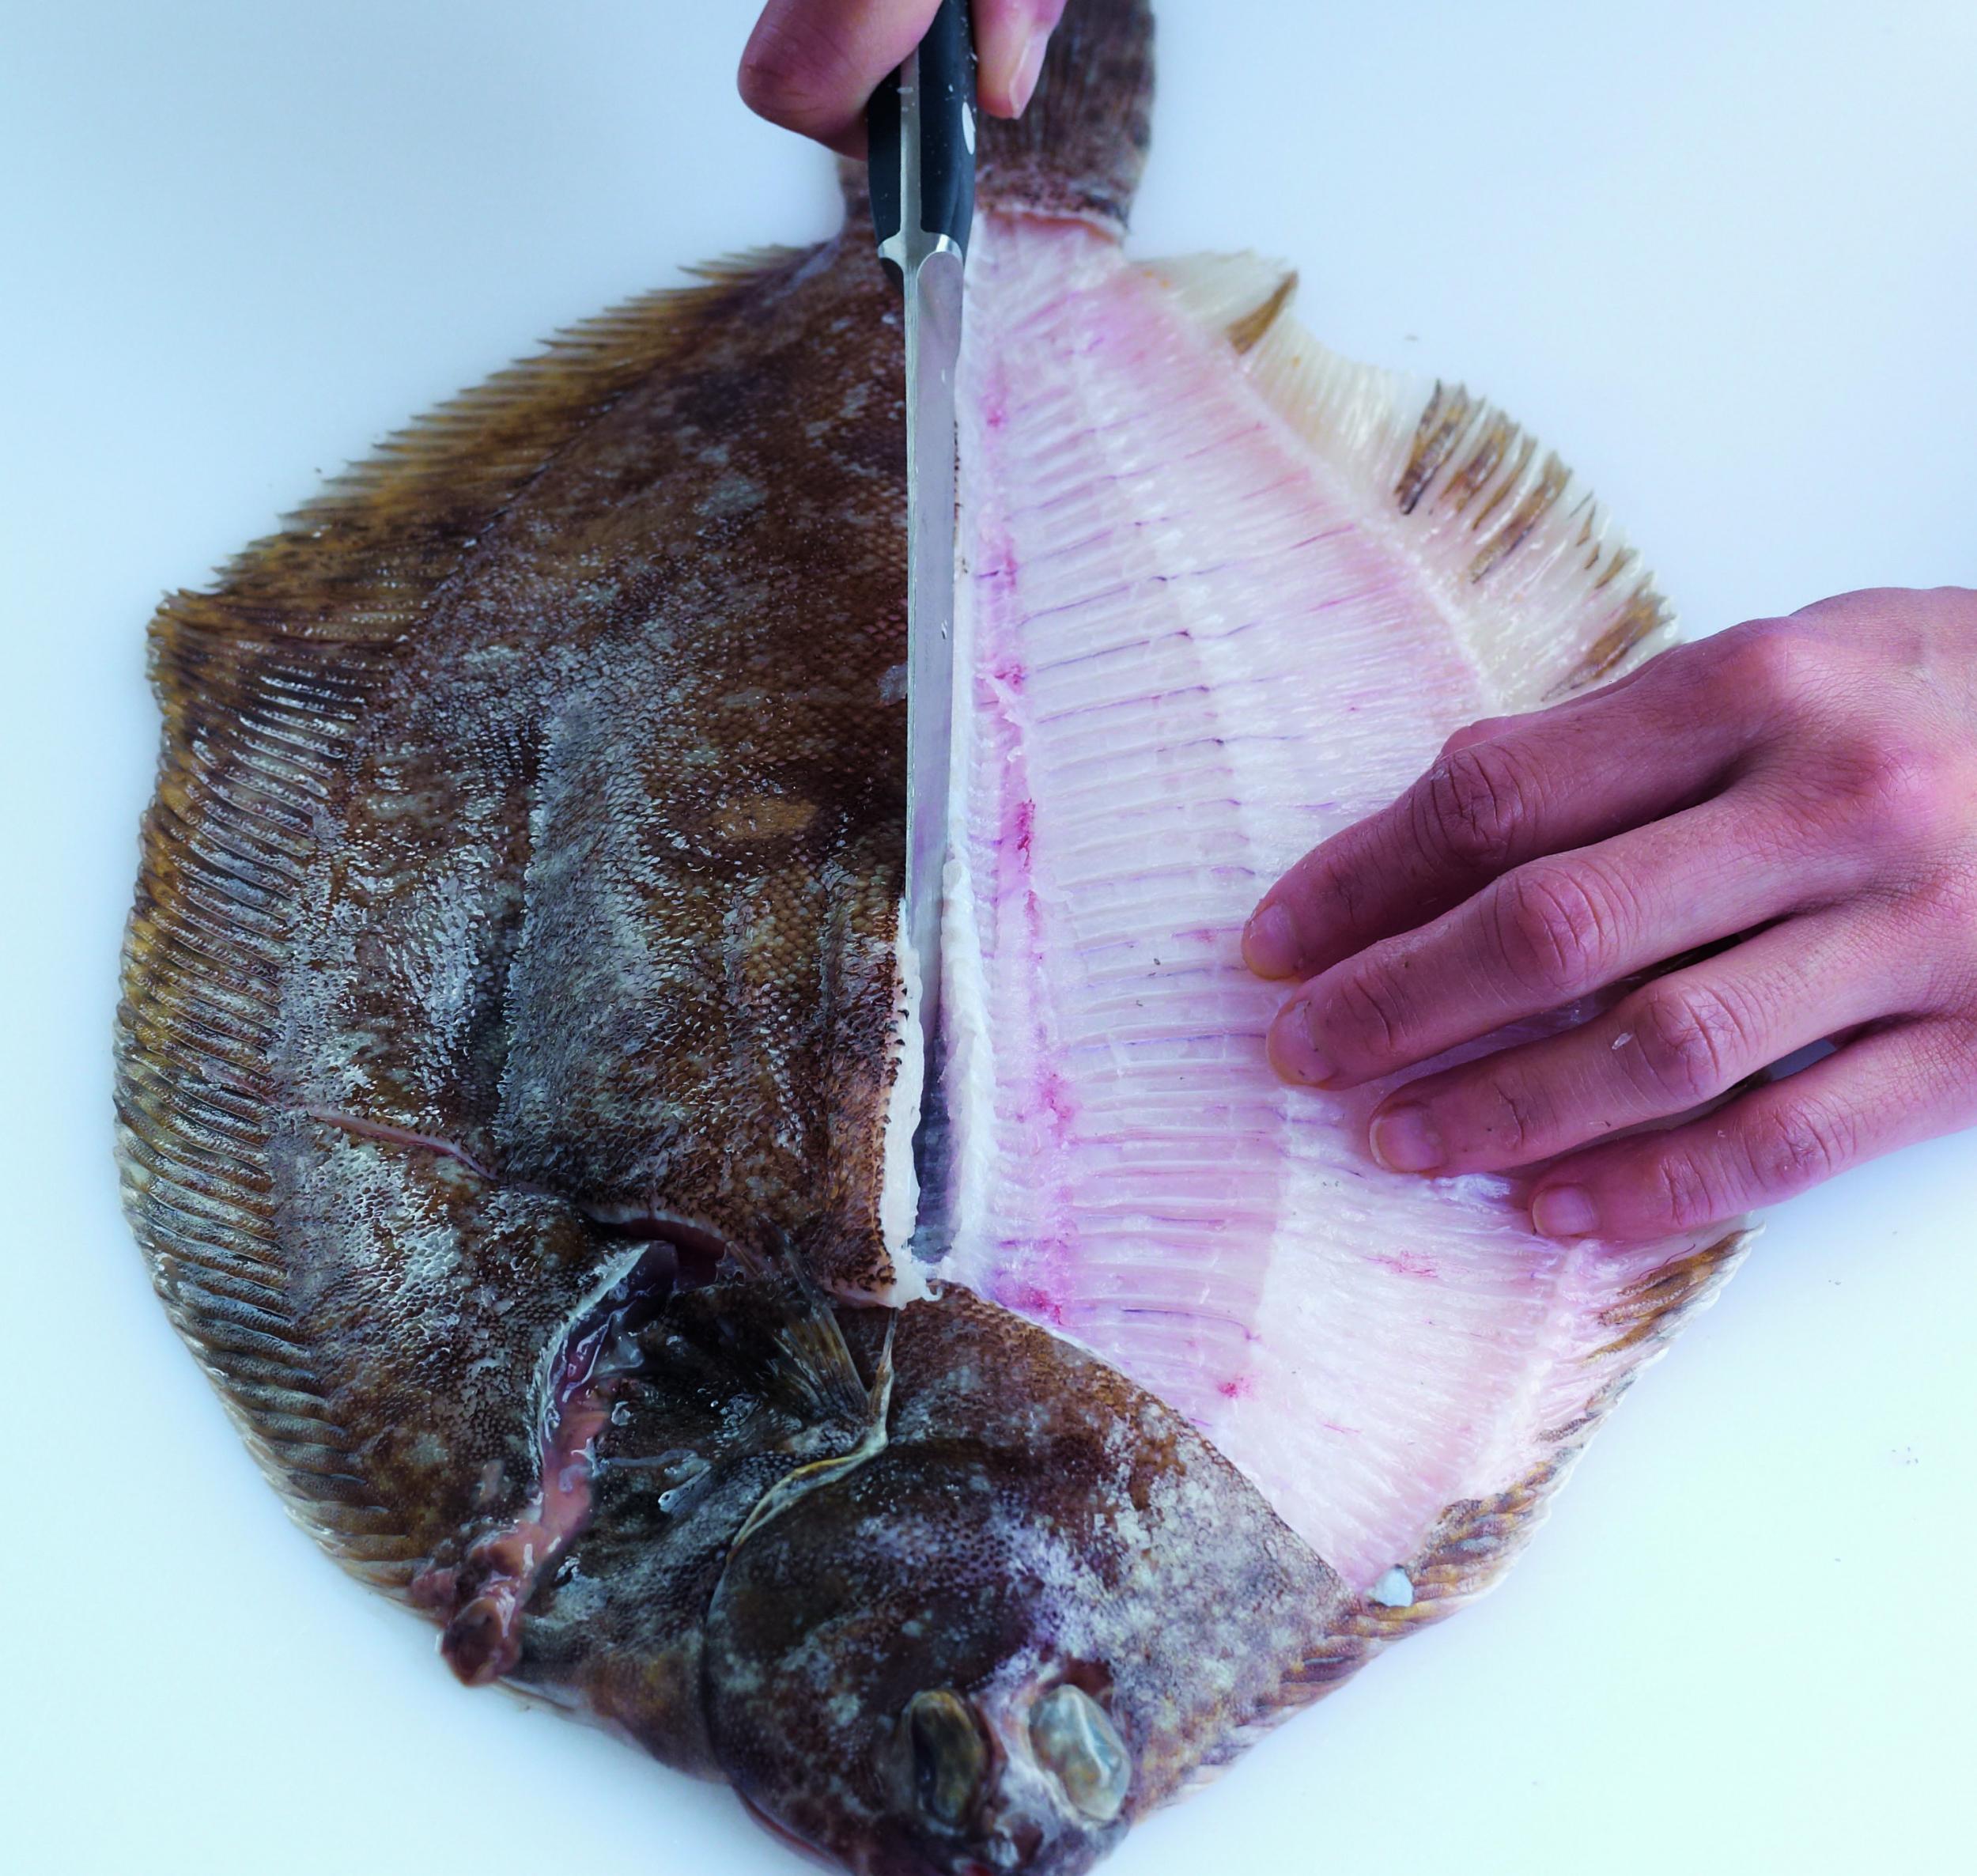
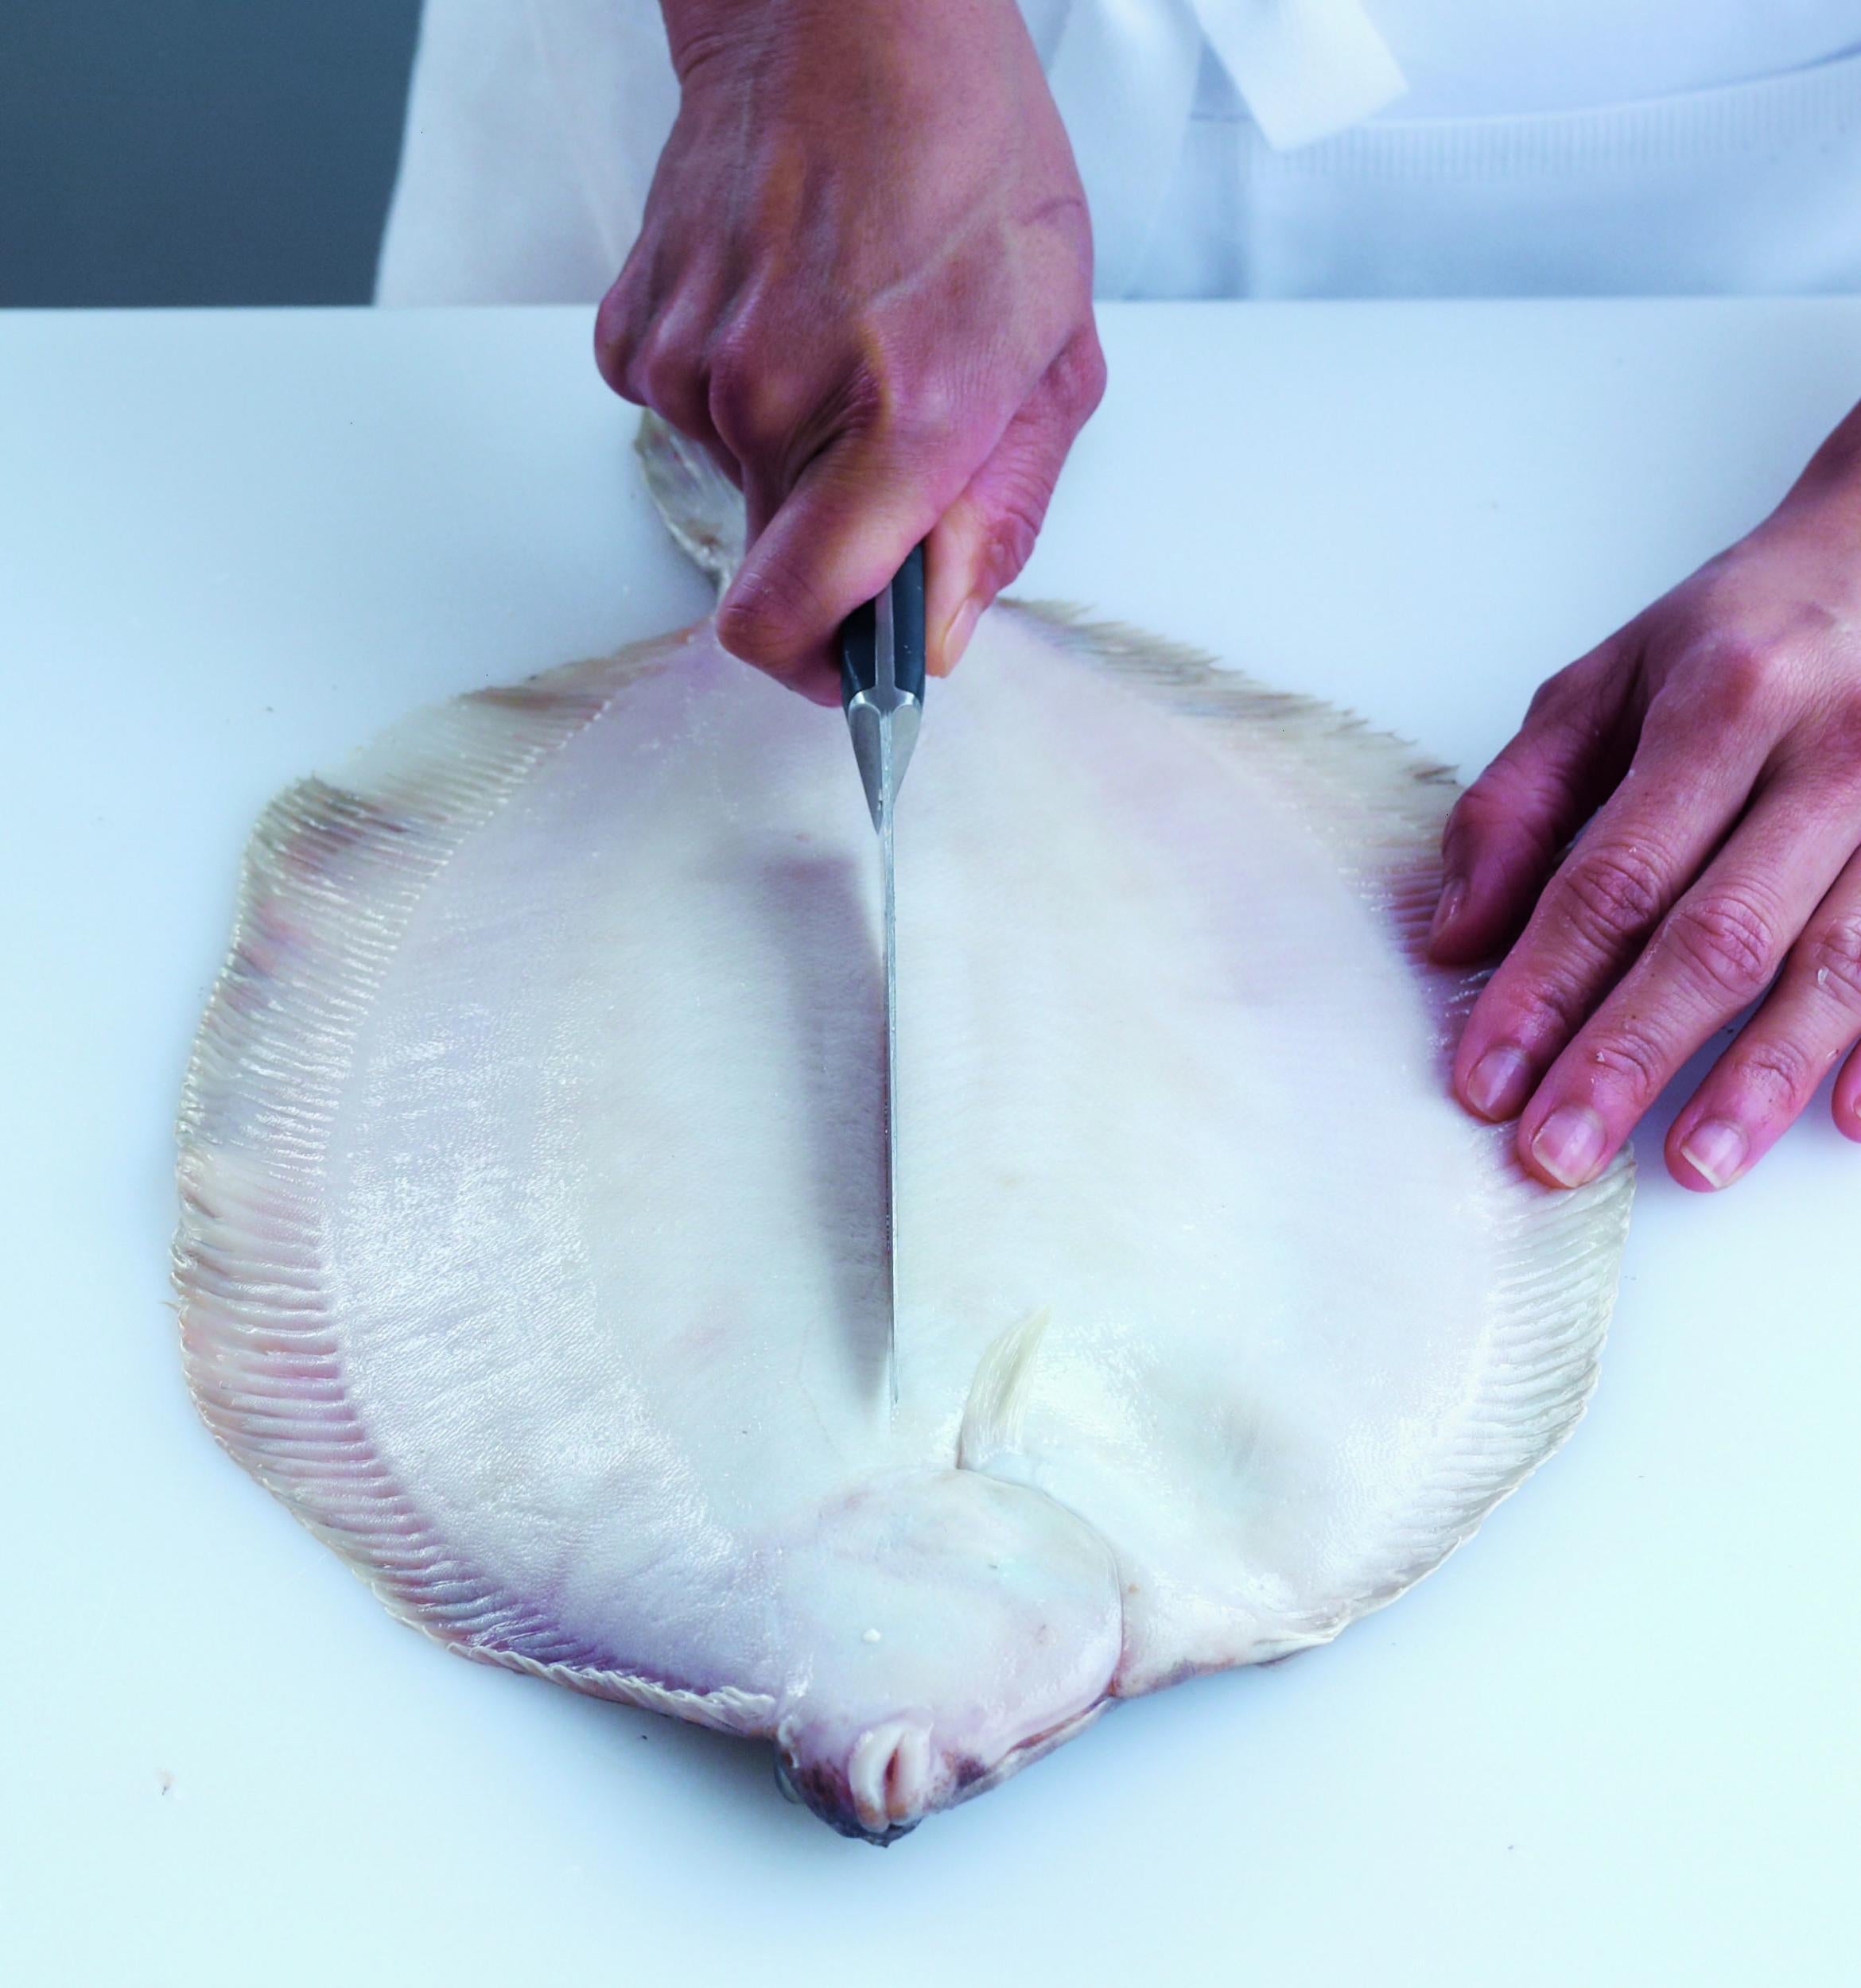
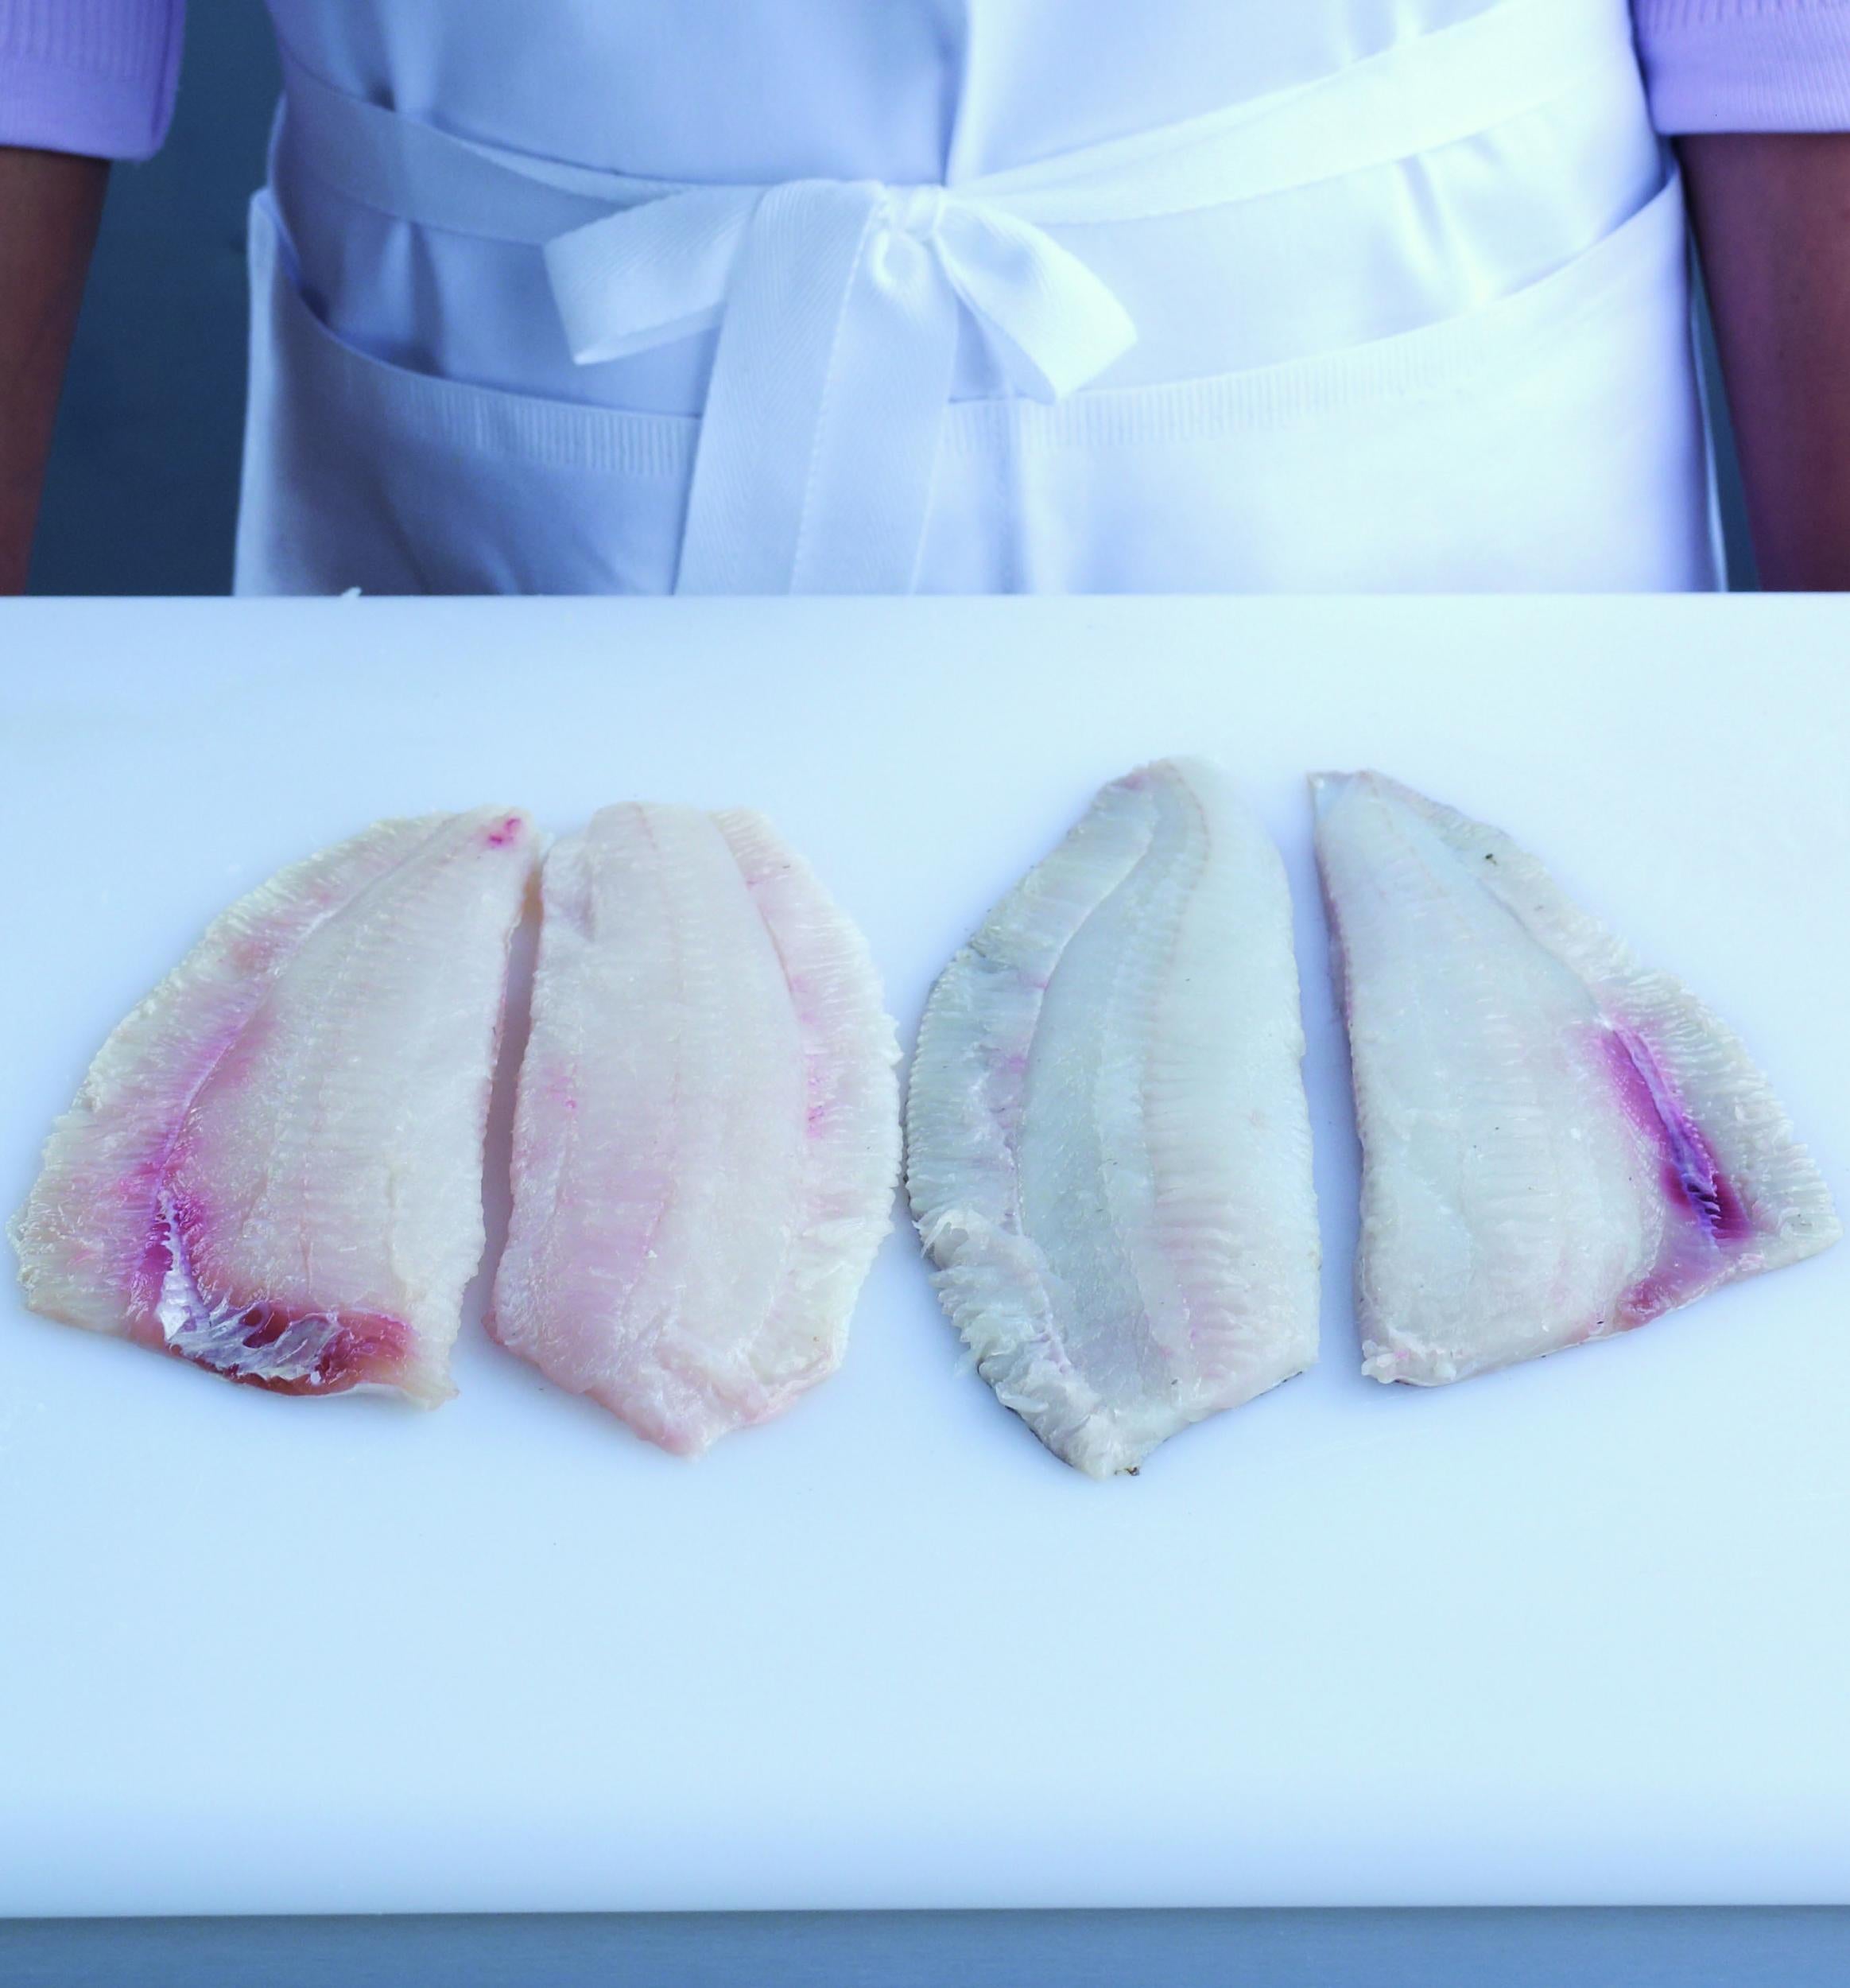
Skinning a flat fish
If necessary, first wipe over the fillets with kitchen paper to ensure they are dry.
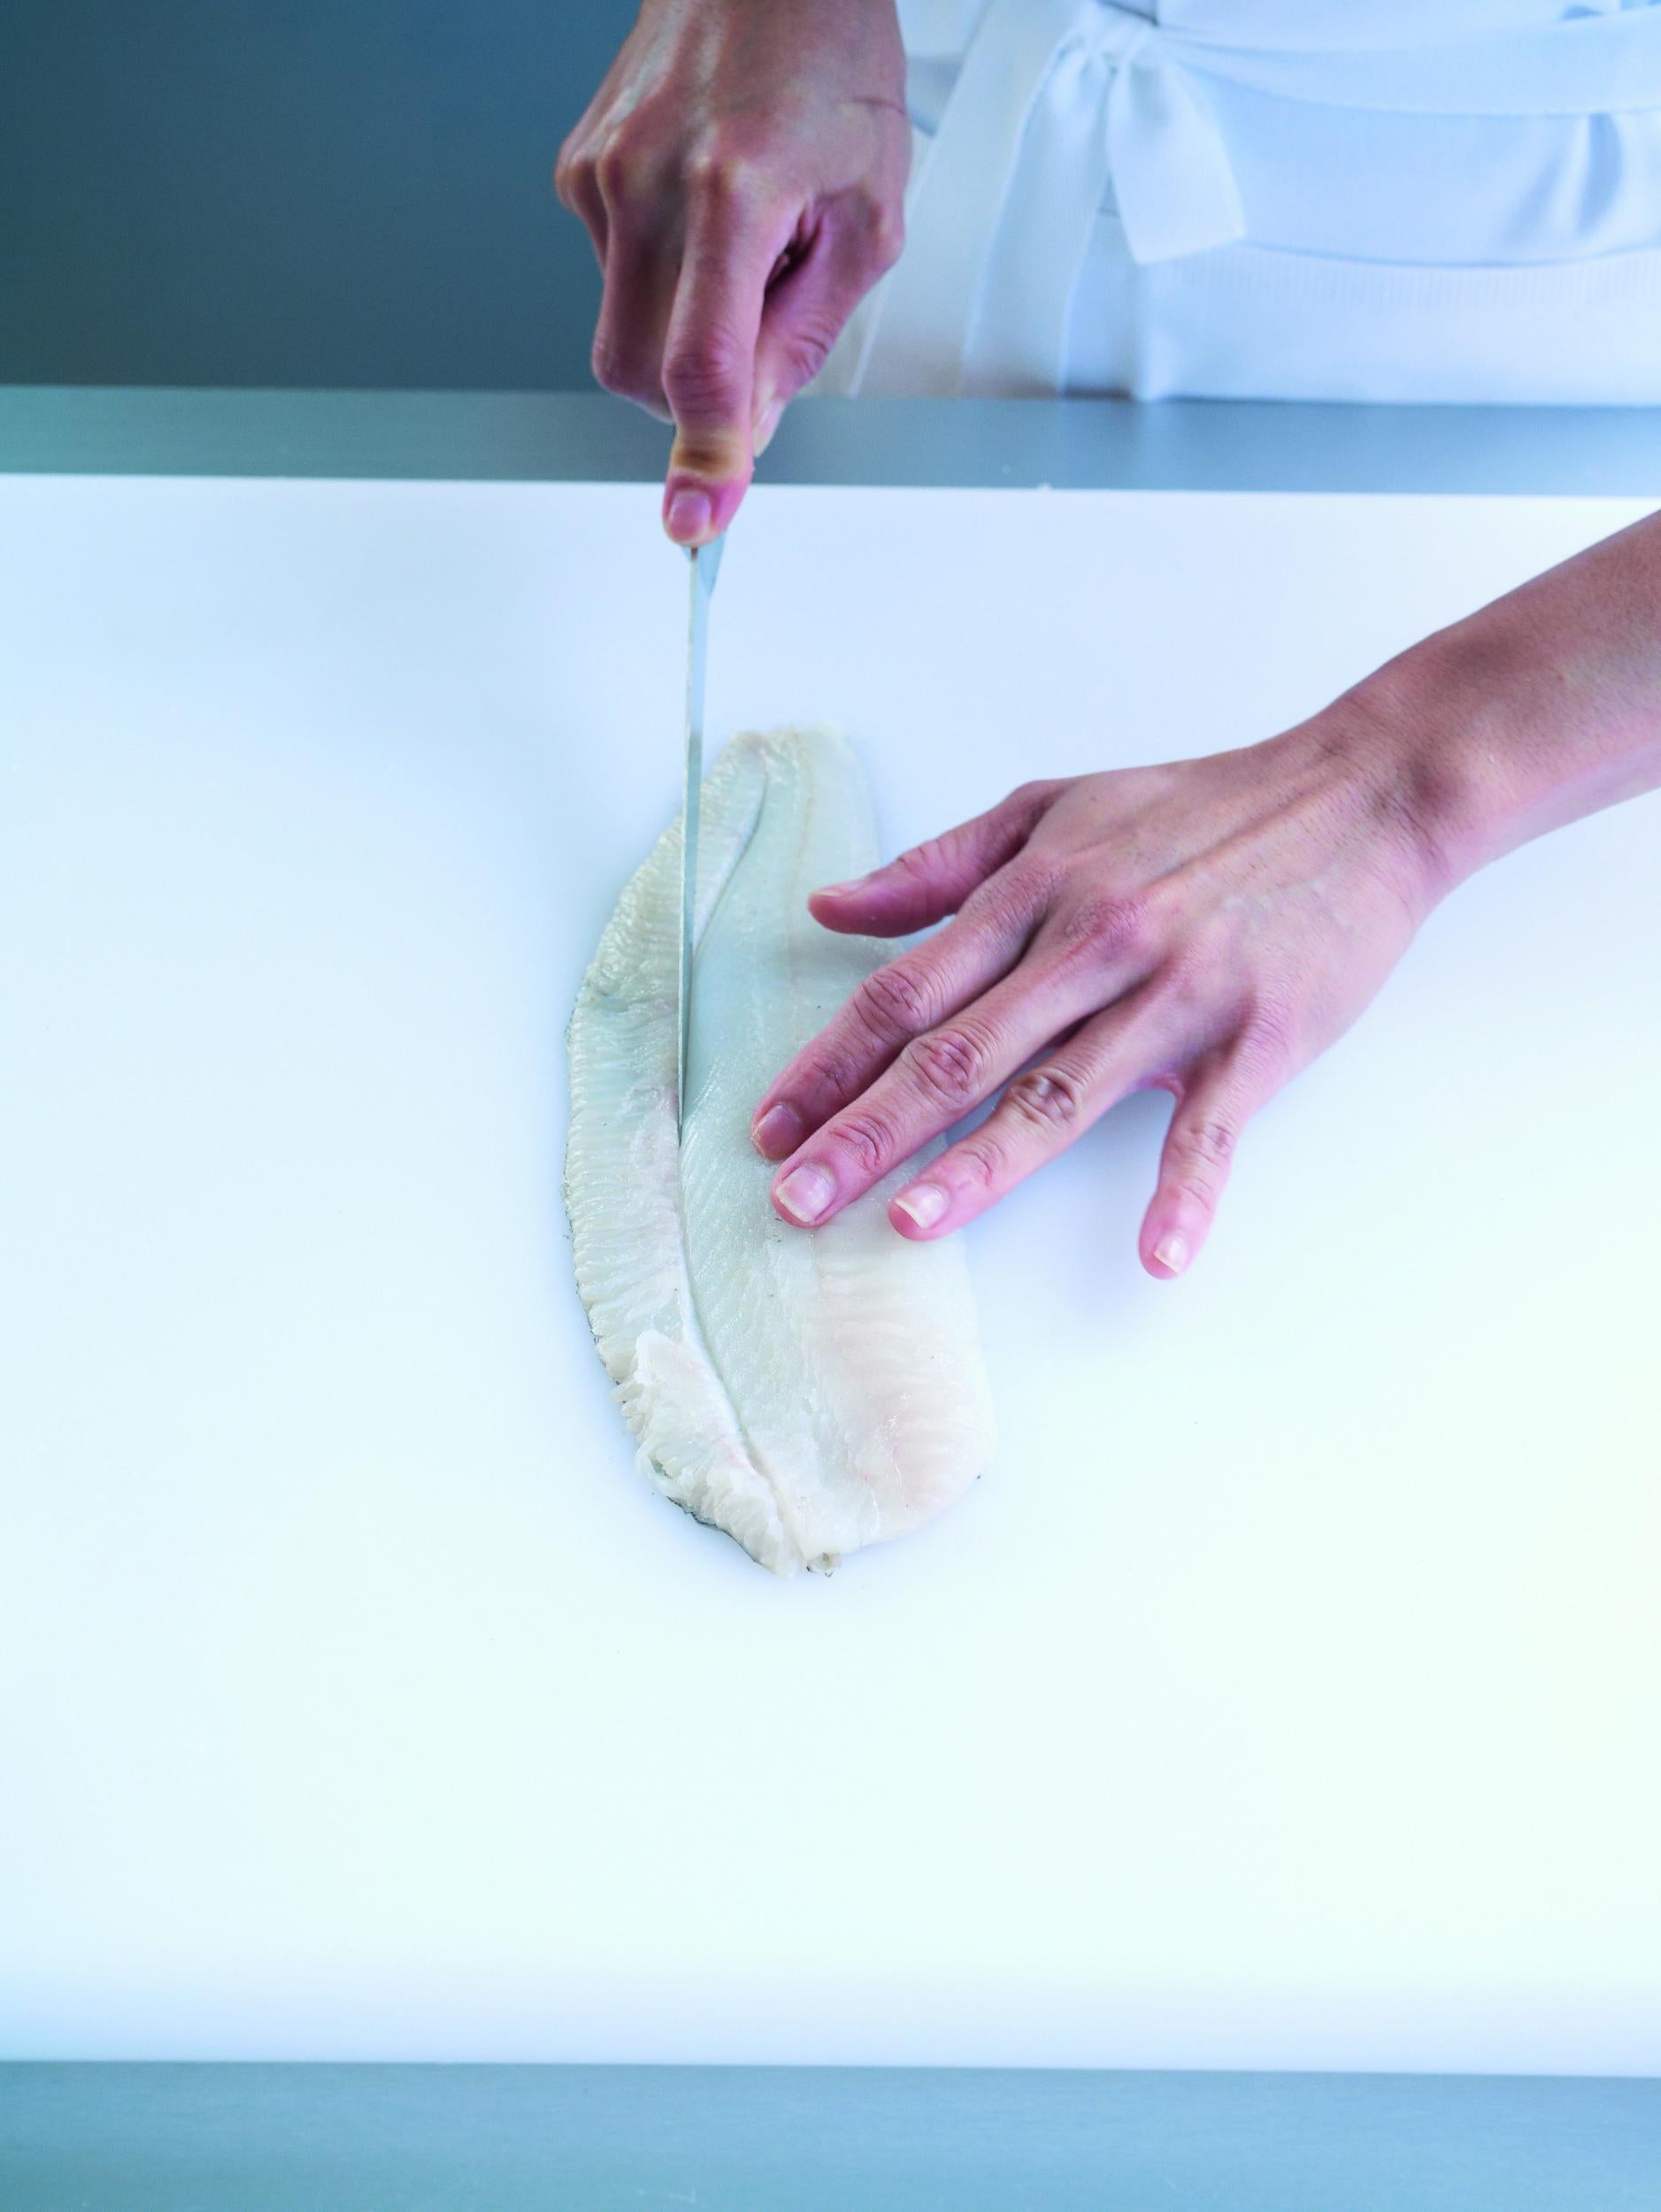
1. Place a fillet skin side down on the board with the narrow end towards you. There is a natural break between the fillet and the frill. Use the tip of a finger to identify and open this. Cut down this line to remove the frill on all 4 fillets. As you become more confident with your fish filleting and skinning skills, it may not be
necessary to remove the frill first; it will naturally come away as the fillet is skinned.
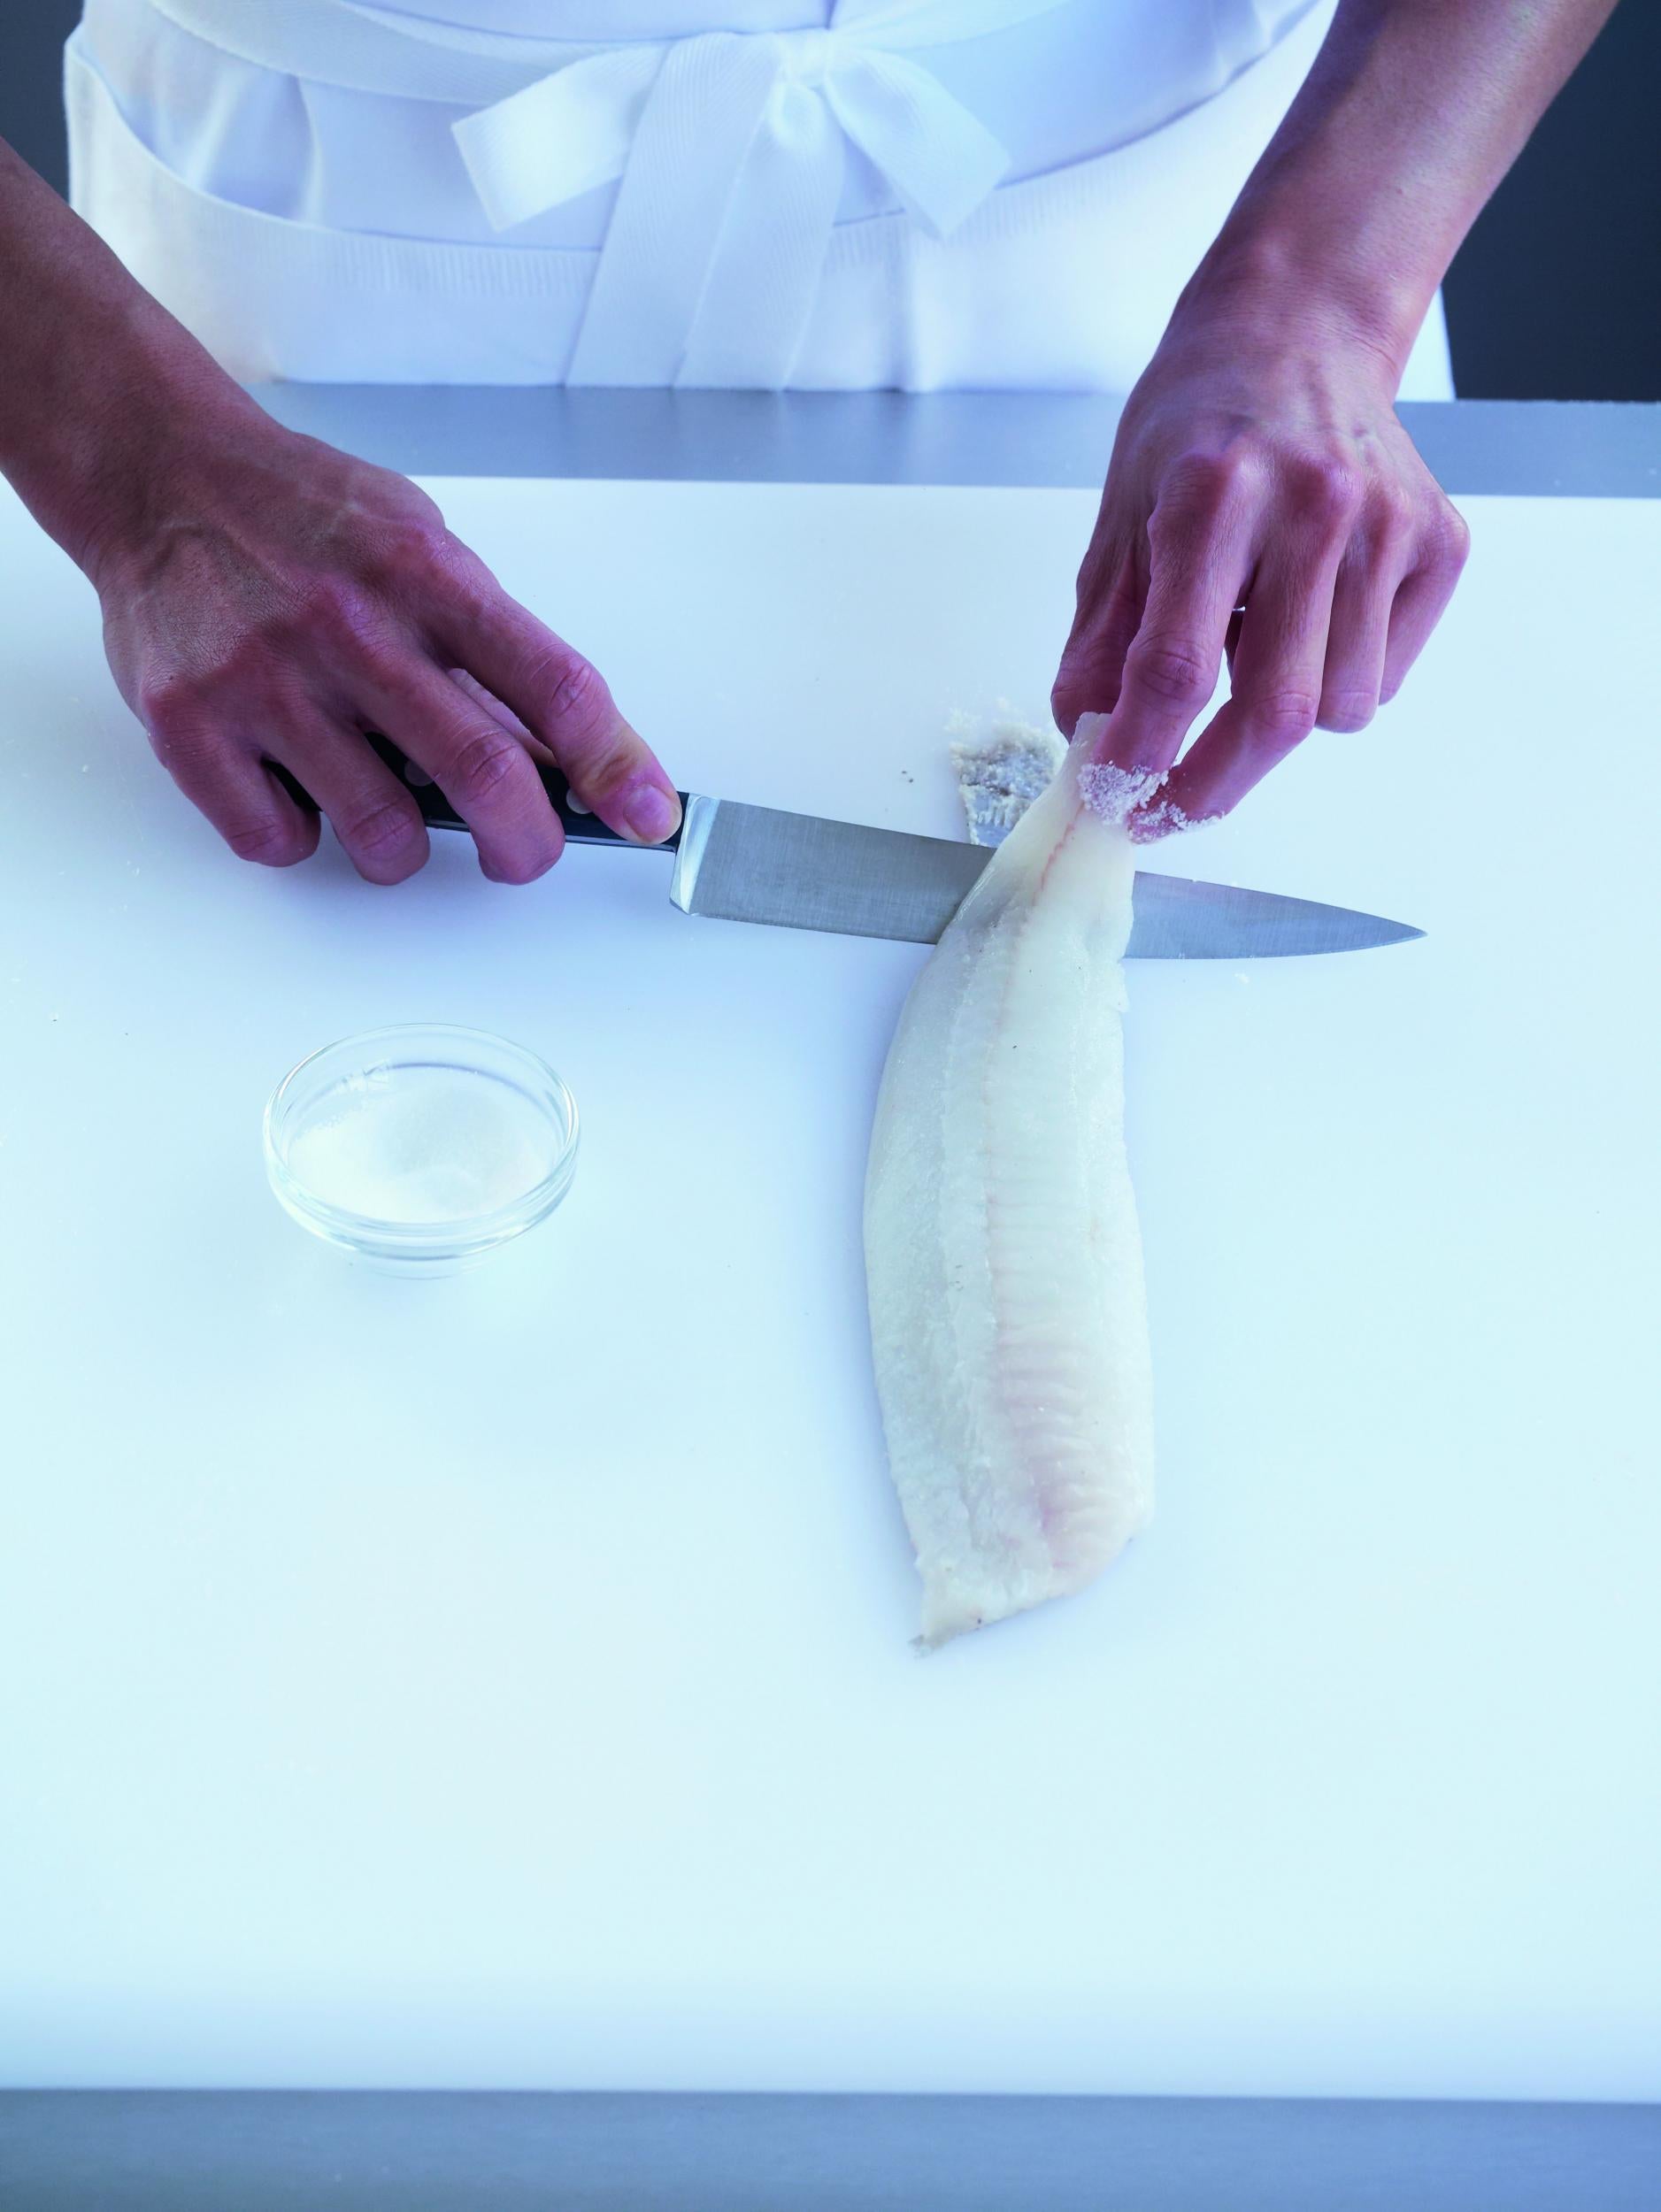
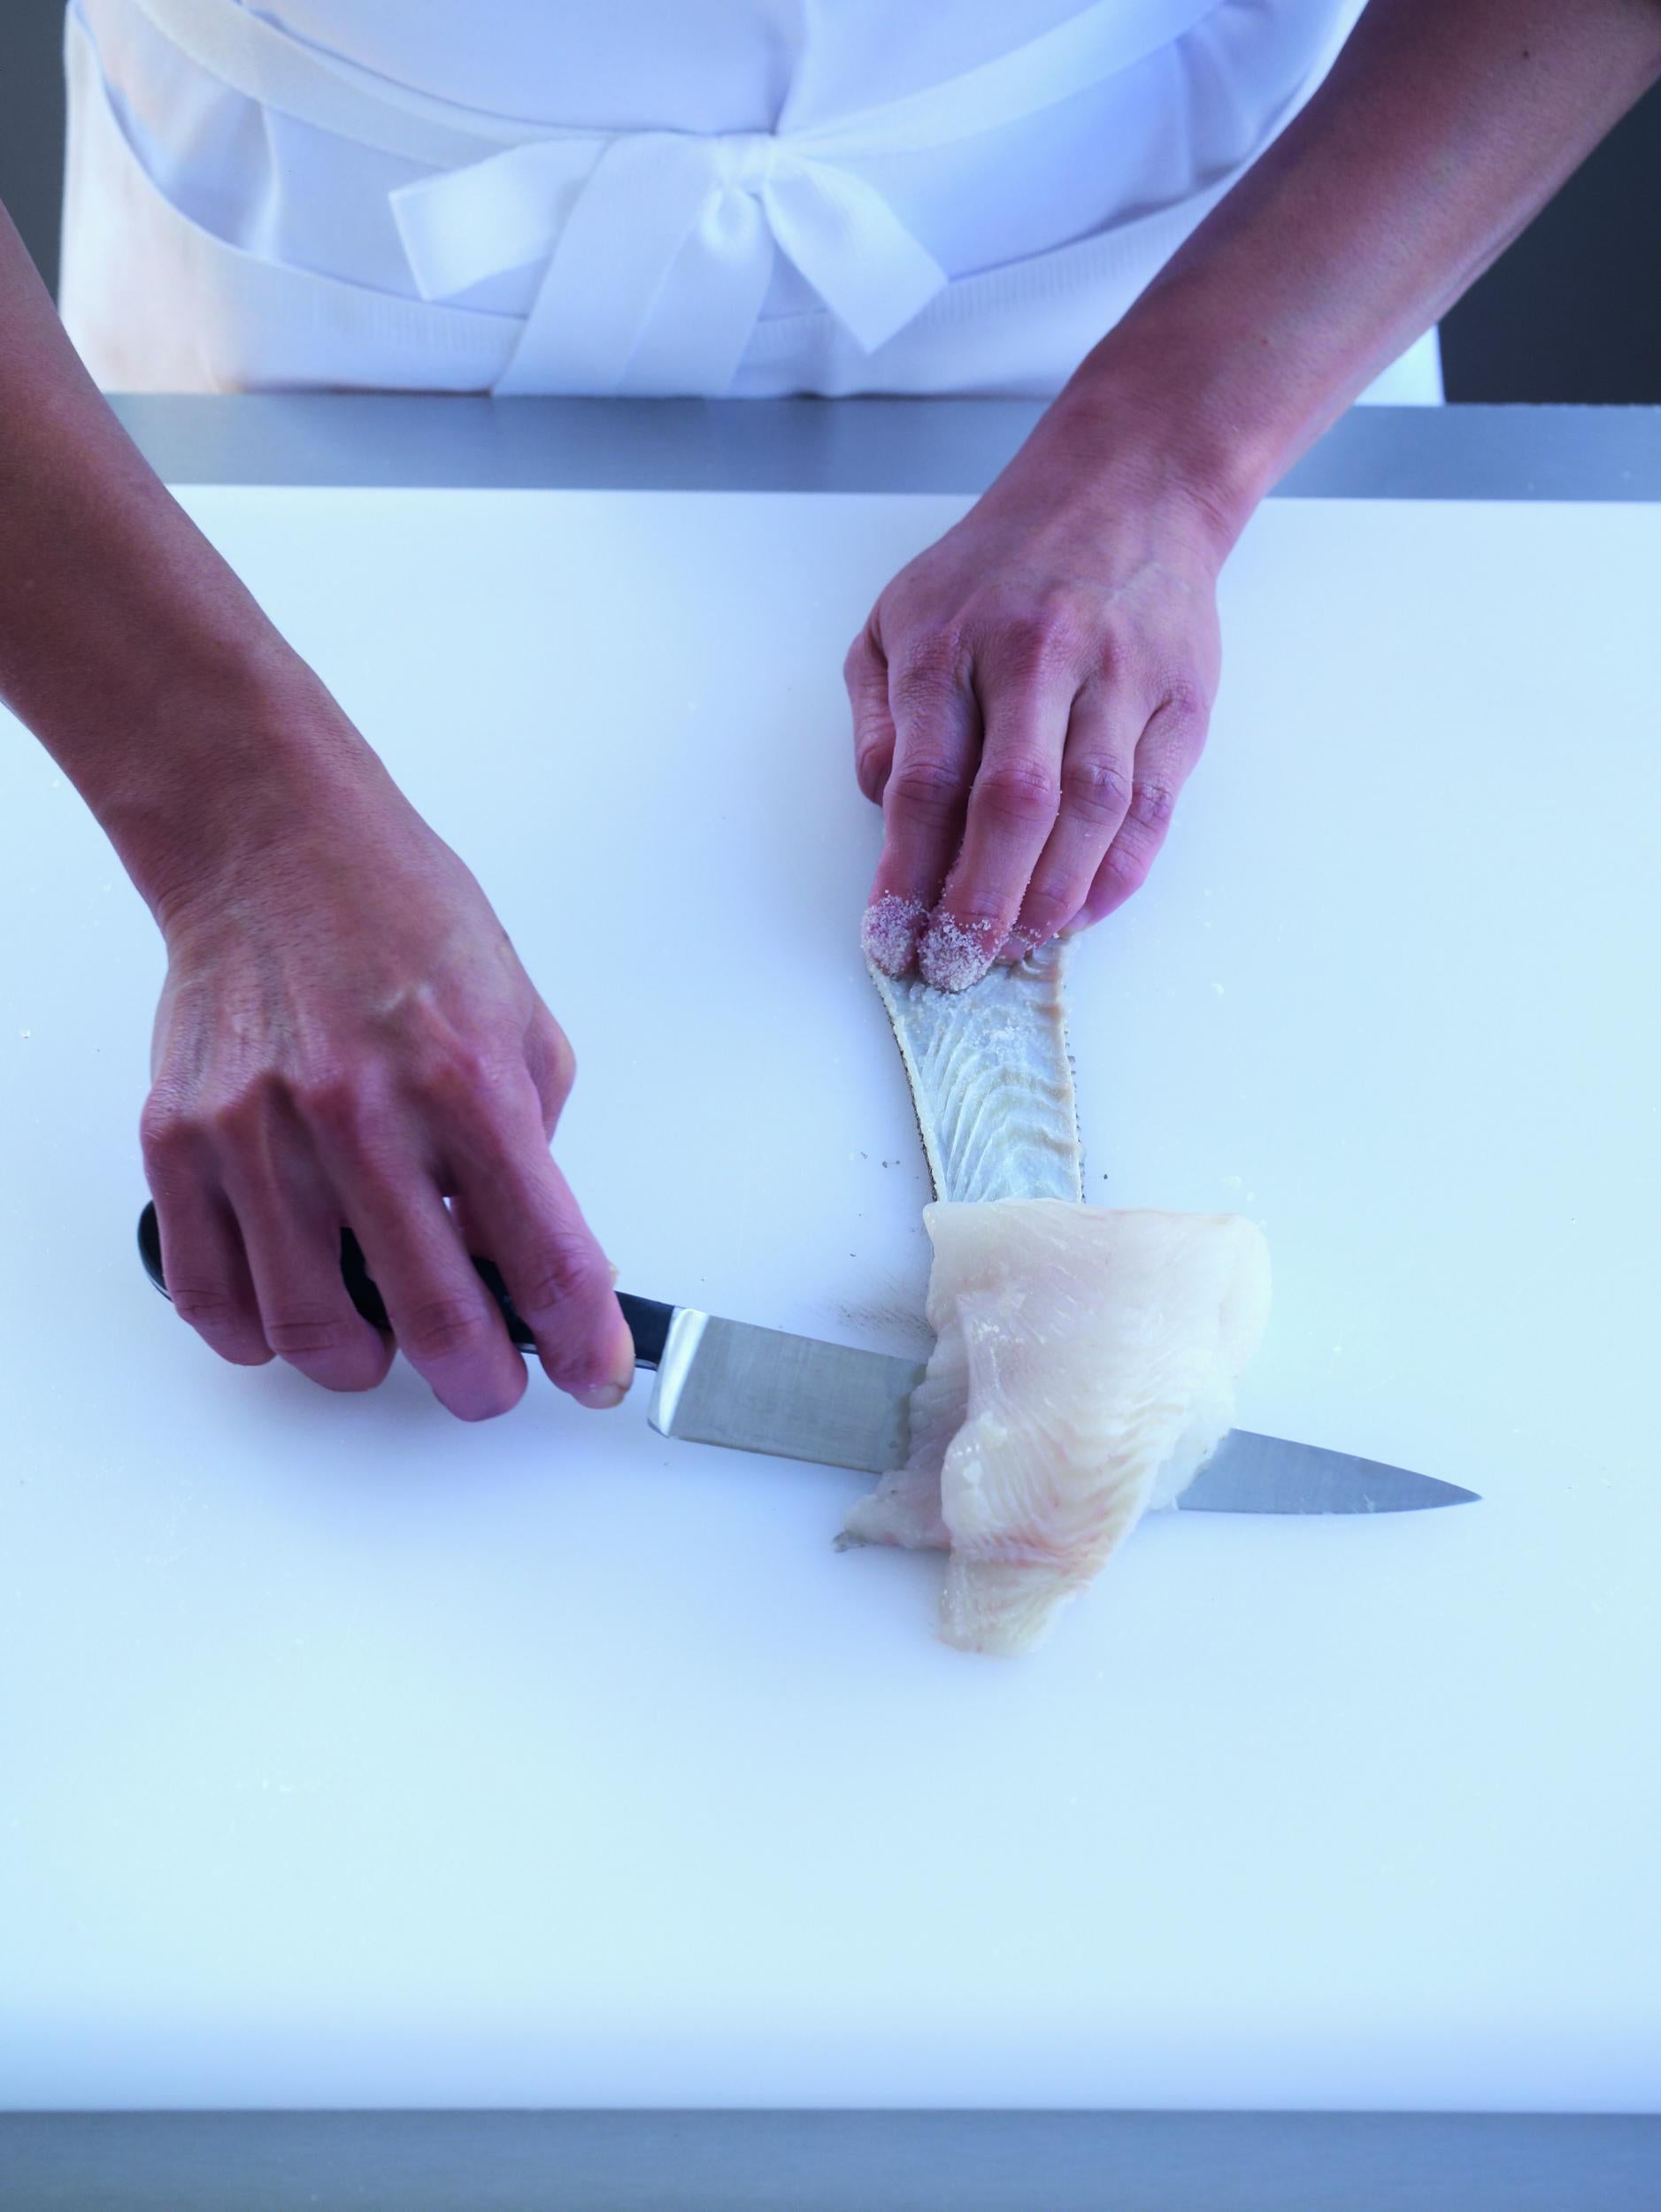
2. Take a little salt in the fingers of your non-knife hand and hold onto the end of the fillet tightly. Insert the knife between the skin and flesh, just in front of your fingers, at a 30–40° angle.
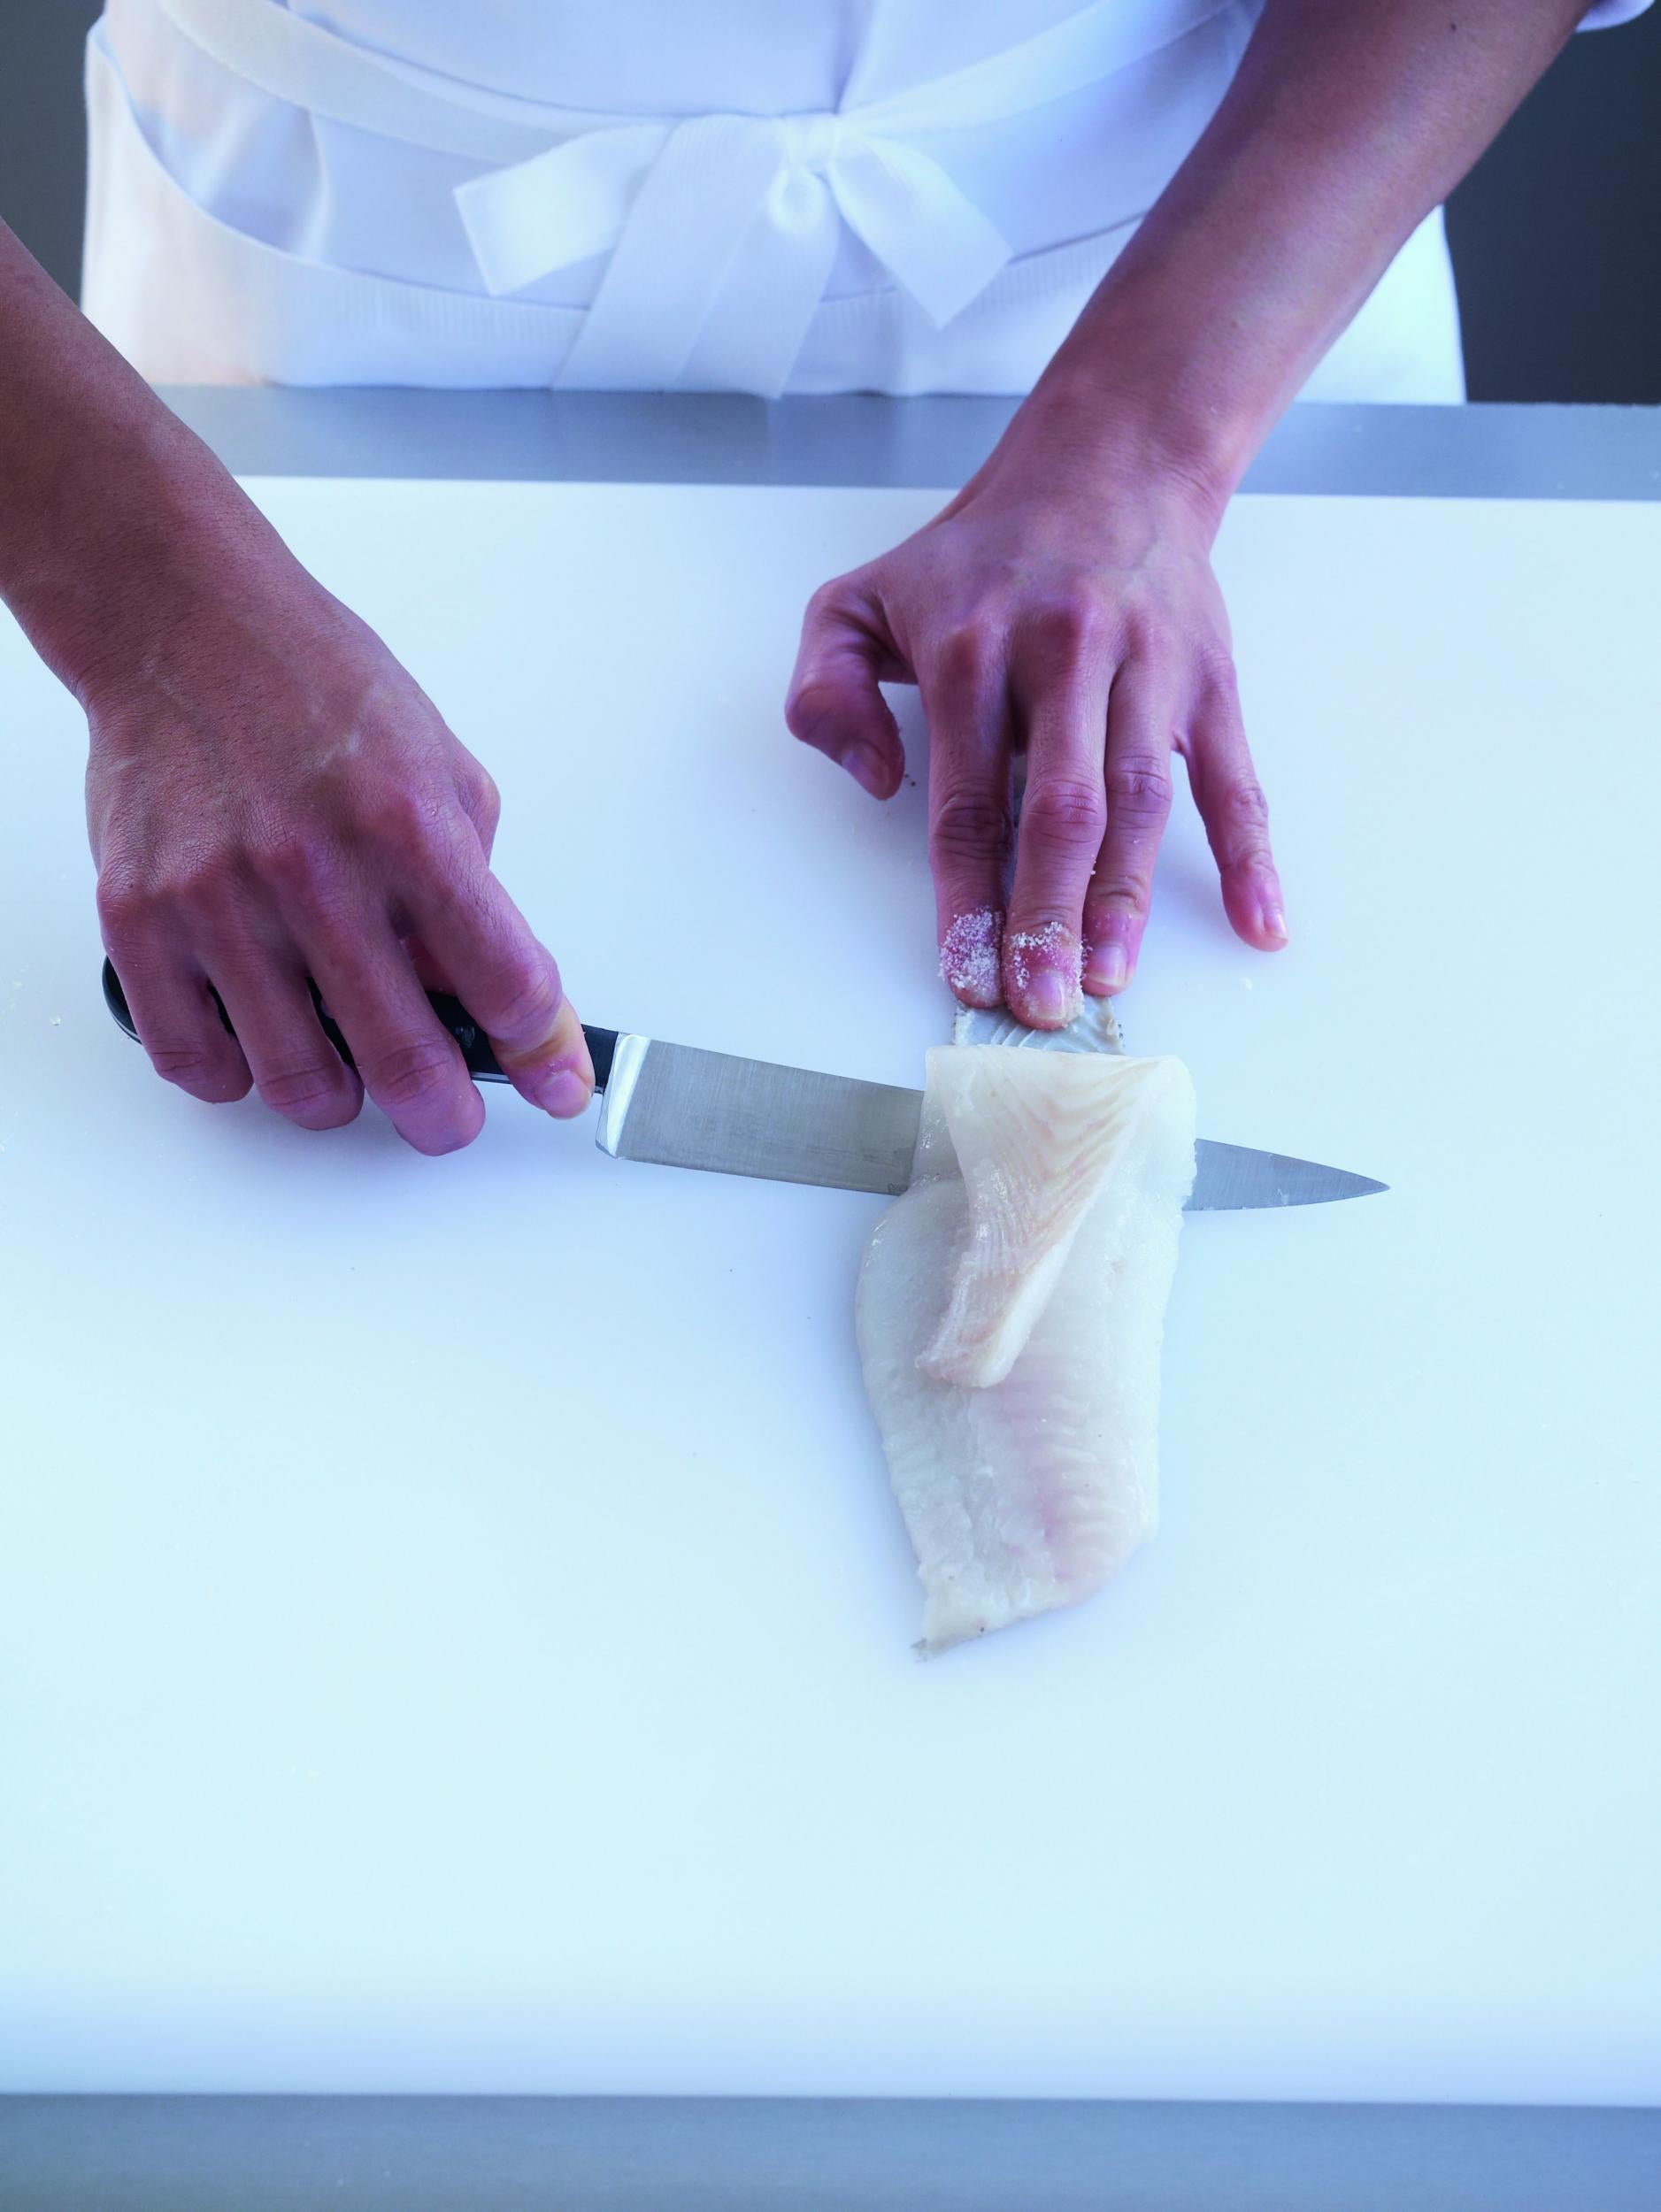
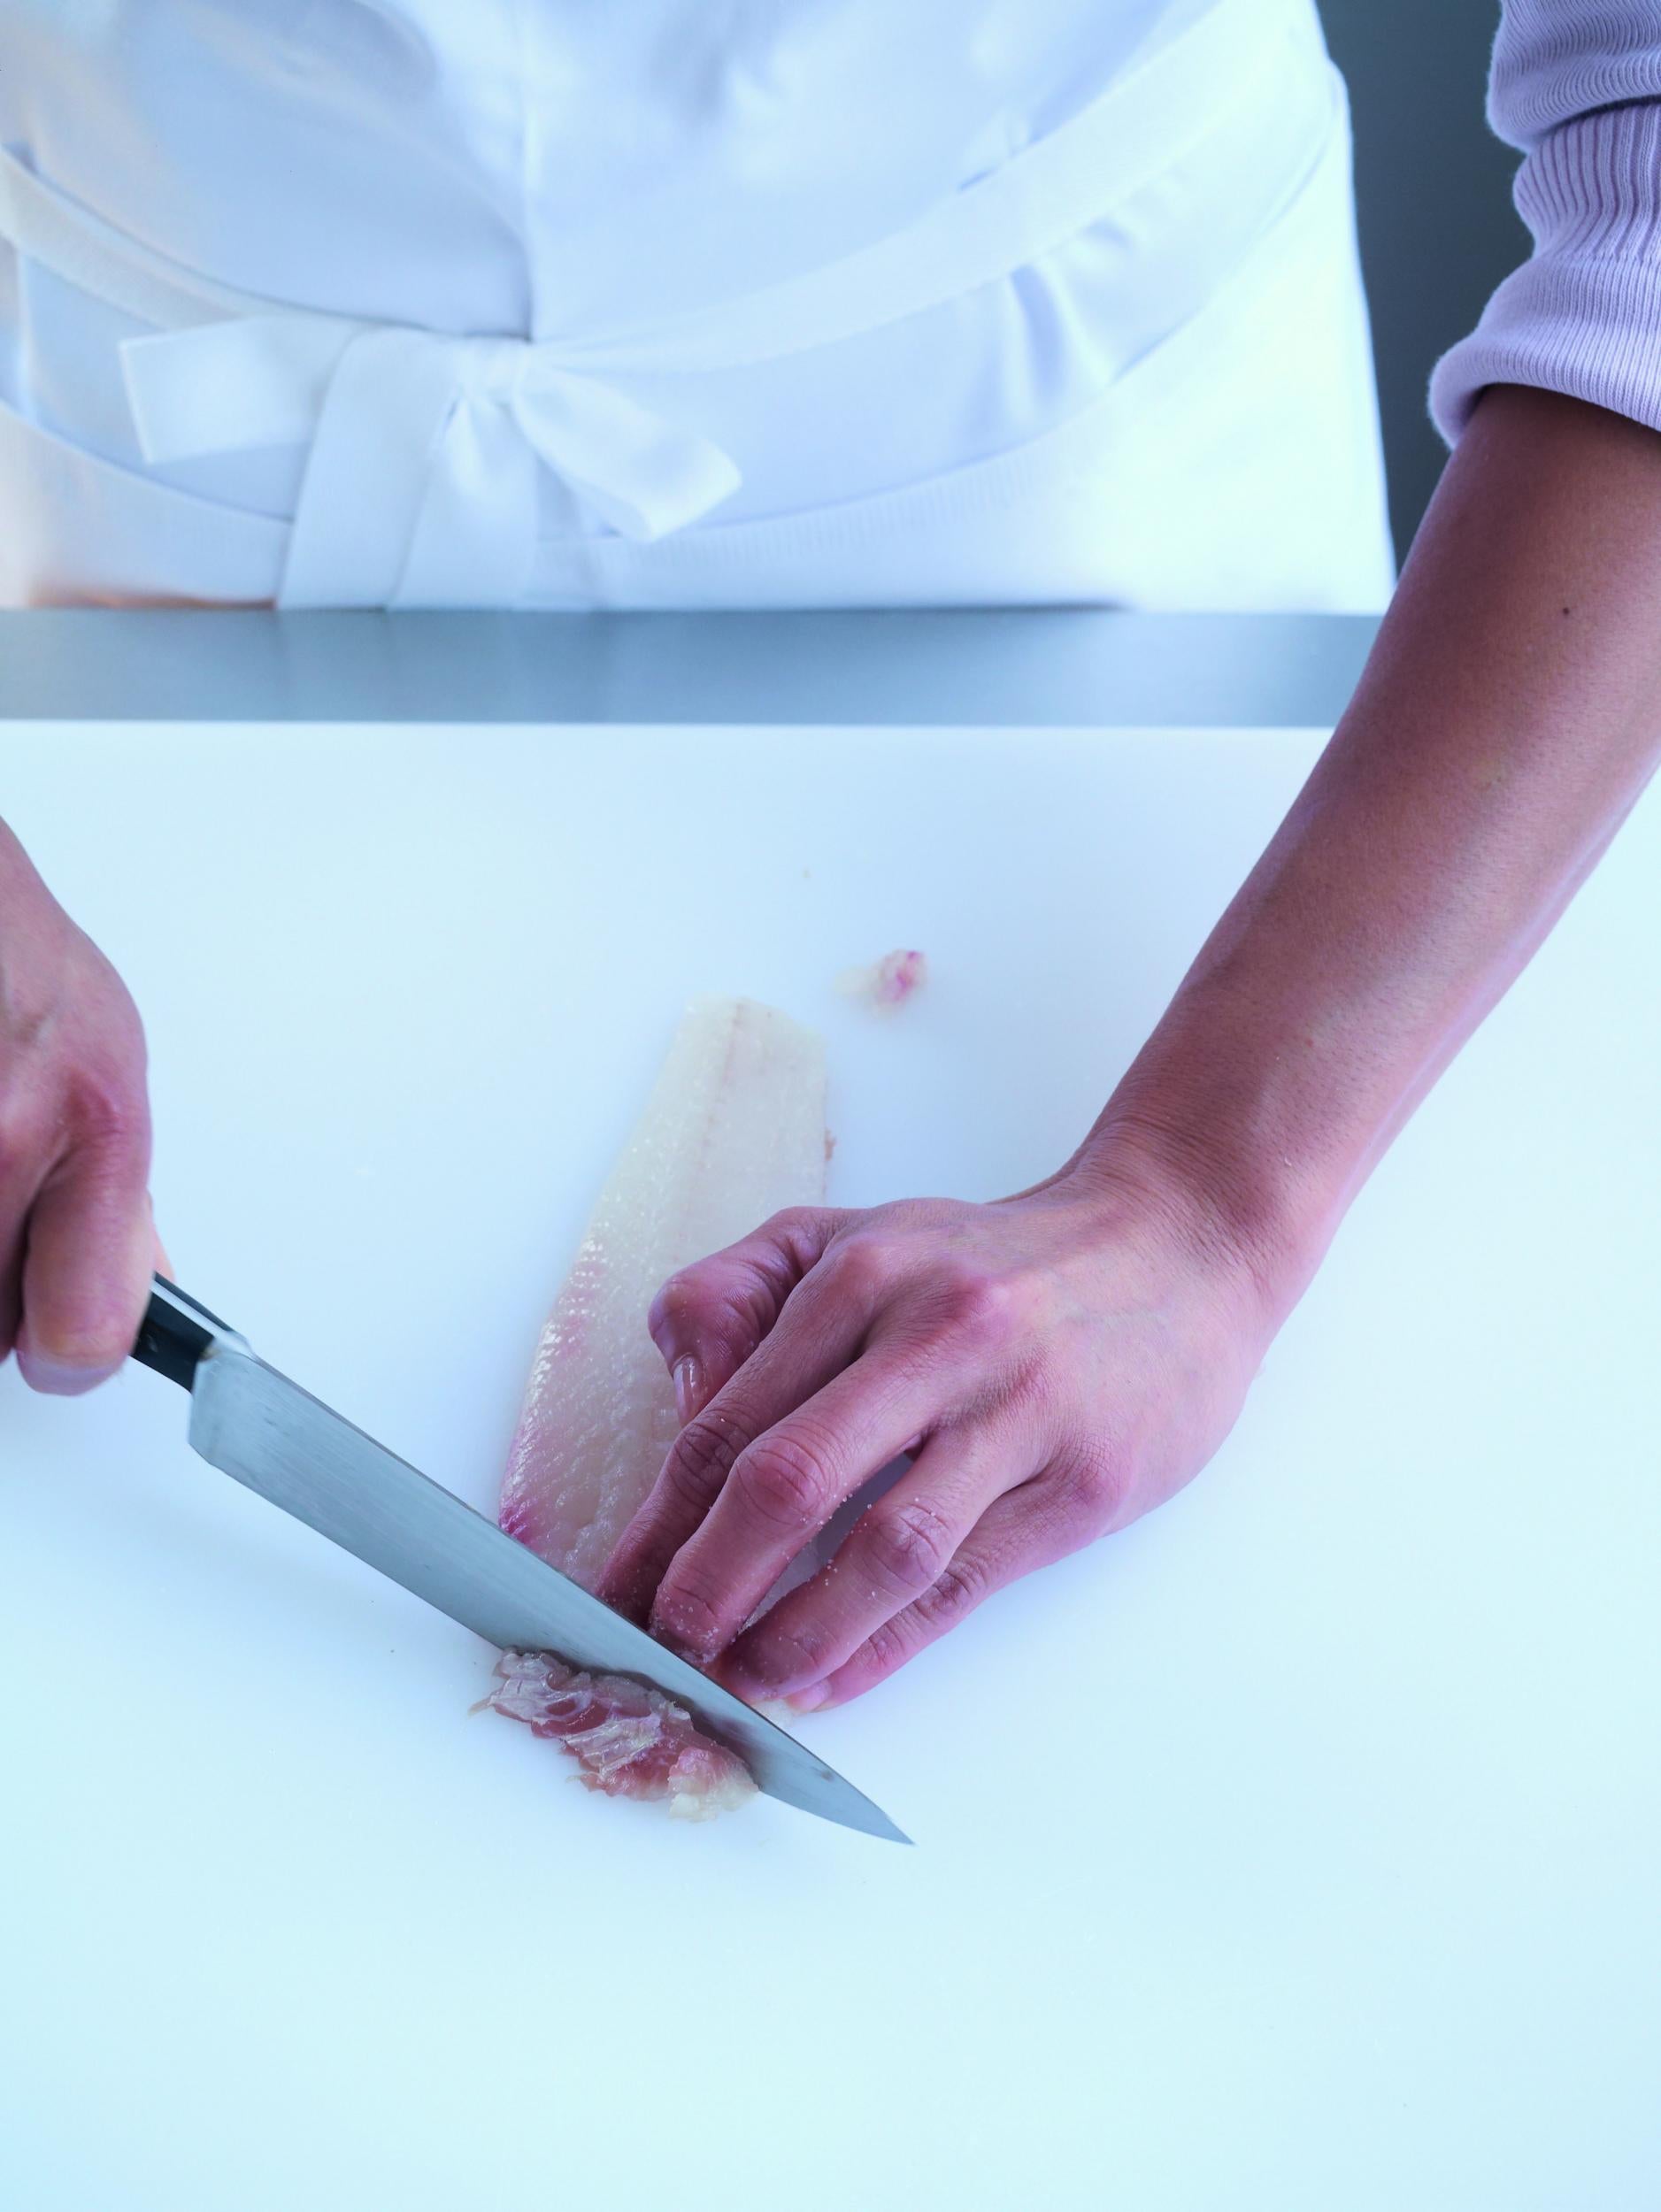
3. Now, holding firmly onto the skin, move the knife decisively to the left and right using an exaggerated sawing action, while maintaining a firm pressure with the knife on the fish skin, to start to release the flesh from the skin.
4. As you release more flesh adjust the position of the fingers holding the skin closer to the unreleased flesh. It is important to firmly press the knife blade against the skin, which is against the board. Work your way up the fillet like this, releasing the flesh as a whole fillet. Take care not to hold the knife blade too vertically or you will cut through the skin, but too flat against the skin and you will leave flesh on the skin; it takes some practice.
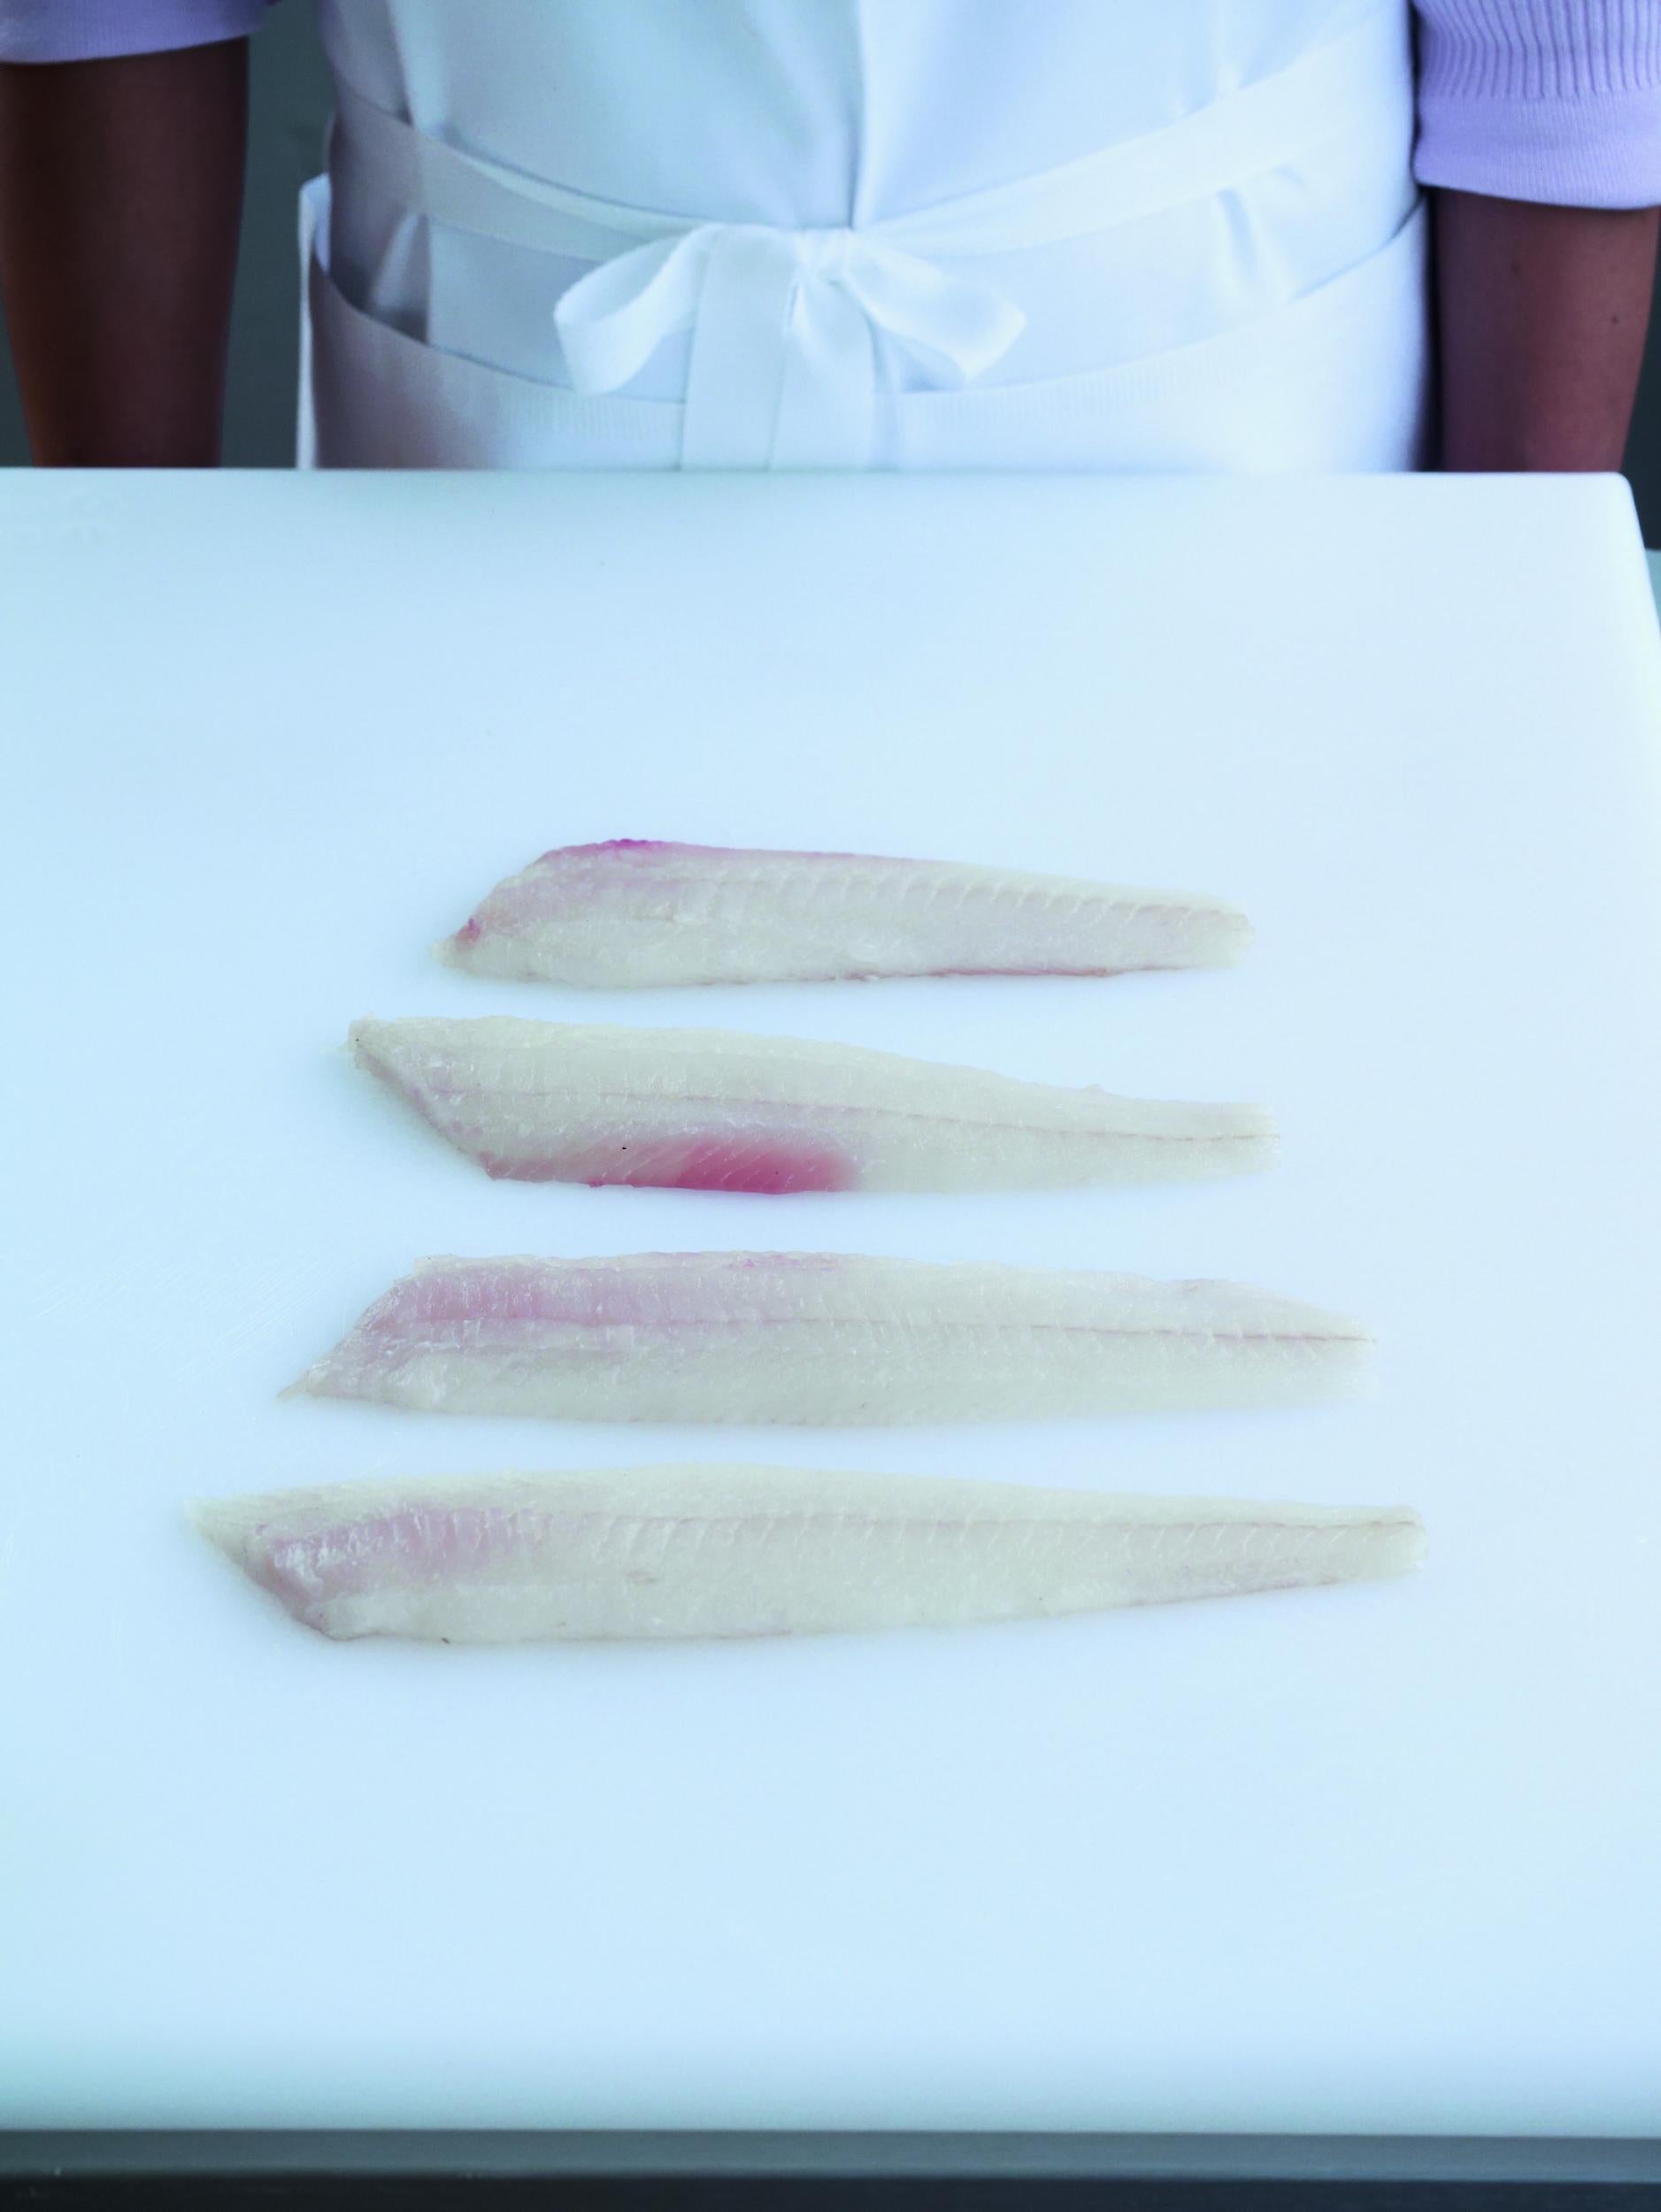
5. Repeat with the remaining 3 fillets. Wipe down the board with kitchen paper and lay the fillets on the board. Once skinned, trim the fillets as necessary, without wasting fish.
6. Feel the fillets all over for bones. Usually this method of filleting leaves the fillets bone free, but it is always good to check. Remove any small bones that you find with kitchen tweezers. The fillets are now ready to use.
Note When skinning, we find it easier to move the knife hand back and forwards, but, as with filleting, if you find it more comfortable to hold your knife hand steady and move the hand holding the skin from side to side, use this technique. You should adopt the method that feels the most comfortable and safest for you, and one that prevents wastage. It is easier to remove the darker skin from the fillets than the paler skin.
Presentation: Generally, when referring to fish, the non-skin side (the bone side) is the best looking side once cooked and will become the presentation side. The skin side generally has a little brown flesh under the skin which is evident after skinning. It also often has a ‘V’ pattern. You should cook the non-skin presentation side first, as this will almost always end up being the best looking and most appetising side.
When folding fillets, fold them skin side inwards, bone side outwards.
There are always exceptions. When grilling, you should grill the non-skin side last, as the second side of a grilled fillet is generally the better looking.

‘Leiths How to Cook by Leiths School of Food and Wine’ (Quadrille, £30) Photography © Peter Cassidy

Join our commenting forum
Join thought-provoking conversations, follow other Independent readers and see their replies
Comments